


The user interface (UI) design process sits at the core of any human-centered product design project. From it, designers bring to life a page or product that stands out from the rest. But what does this process look like? And how can you use it to improve your product?
In this guide, we will explore what the process is all about, how it relates to user experience (UX), and how you can implement it. Let's get started.
What’s UI design?
User interface (UI) design is about building interfaces with a focus on styling and interactivity. The UI designer’s goal is to create an interface the user finds easy to use and aesthetically pleasing.
The word “interface” refers to the access point where a user interacts with a software application (e.g., Figma, Sketch), a browser-based website, or a hardware device (e.g., a smartphone touchscreen). A UI designer explores all the interactions and behaviors a user takes with a product to create an interface that best adapts to the user’s needs.
When we talk about UI design, we talk about the stylistic choices a designer makes when creating a product, e.g., an image, button, menu bar, or footer. All of these elements will affect the user’s interaction, and so, must be planned accordingly.
What’s UX design?
User experience (UX) design is the process designers use to create products that deliver relevant and valuable experiences to users. According to Don Norman, the co-founder of Nielsen Norman Group and the one who coined the phrase “user experience,” the term includes “all aspects of the end-user’s interaction with the company, its services, and its products.”
UX designers create meaningful experiences by integrating elements of branding, marketing, engineering, design, and usability into a product. Their job requires extensive user research to understand their user’s mindset, feelings, and goals and to connect this information to the product.
Check out our article on the 21 main UX laws for creating winning designs.
UX vs. UI: What’s the difference?
When we talk about UX and UI, we refer to two separate concepts that meet different objectives. Although they are related—and soon you will see how—you need to understand their differences to use them properly.
According to Maze CEO, Jonathan Widawski, UI design “is the process of transforming wireframes into a polished graphical user interface.” In contrast, UX design requires “understanding the overall journey of your users and turning it into a product.”
In other words, if you were designing a house, “UX would be the foundation, while UI would be the paint and furniture.”
Another way to think about the differences between UX and UI design is to look at the outputs of both processes:
*“UX starts with a problem and ends with a wireframe or prototype. The role of a UX designer is to understand the customer journey. That means understanding the target audience, interviewing customers, defining user flows, and conducting user testing.
UI design is about using typography, images, and other visual design elements to turn a basic interface into something digestible and usable. A UI designer focuses on how the colors, typography, and images of a design connect to the brand of a product.”* — Jonathan Widawski, Maze CEO & Co-founder
Although there are key differences between UX and UI, these two processes work hand in hand for a product designer. As Jonathan explains, “We shouldn’t talk about UX vs. UI. Instead, it should be UX and UI because they overlap and complement each other.”
10 UI design guidelines
Creating a successful user interface requires applying a set of design guidelines and principles. There are various well-known principles to keep in mind, like the eight golden rules of UI design from Ben Shneiderman.
In this section, we’ll look at the 10 user interface design guidelines from Nielsen and Molich, which are an updated version of Shneiderman’s principles and are the gold standard when it comes to ensuring your designs fulfills all requirements.
- Visibility of system status: Systems should offer appropriate feedback within reasonable time. For example: when a user clicks on a button, it changes its background color as well as its font.
- Match between system and the real world: Use familiar language your target audience can understand. Design your UI using symbols and objects that relate to the real world. For example: add a magnifying glass icon to a search bar.
- User control and freedom: Give users space to go back and undo or redo previous actions.
- Consistency and standards: Standardize every UI element to guarantee consistency throughout your system.
- Error prevention: Reduce any potential errors in your system, and flag them when they happen so the user can fix the issue right away.
- Recognition rather than recall: Minimize the amount of information a user needs to remember by offering help within the specific context in which a user is. Avoid giving them long tutorials upfront.
- Flexibility and efficiency of use: Let users customize or tailor their interface to suit their needs so that frequent actions can be achieved through shortcuts and touch gestures.
- Aesthetic and minimalist design: Keep both your content and visual design simple. The user shouldn't get distracted or confused by unnecessary elements that get in their way.
- Help users recognize, diagnose and recover from errors: Highlight your error messages and use plain language that give specific solutions to your user's problems.
- Help and documentation: Ensure your documentation is easy to find and understand. Present the documentation in context right at the moment that the user requires it and make it actionable.
A step-by-step look at the UI design process
The user interface design process happens during the later stages of the product development process after a team of designers, developers, and product manager carries out extensive user research. In this sense, the UI design process builds upon what the UX design process has defined, adding the right styles and interactions to create an ideal user experience.
Although we will present the following steps linearly, you should be aware that the following process isn’t necessarily so; some of these steps may change as the design changes after rounds of testing and requires iterating between each step.
Understand the problem you are trying to solve

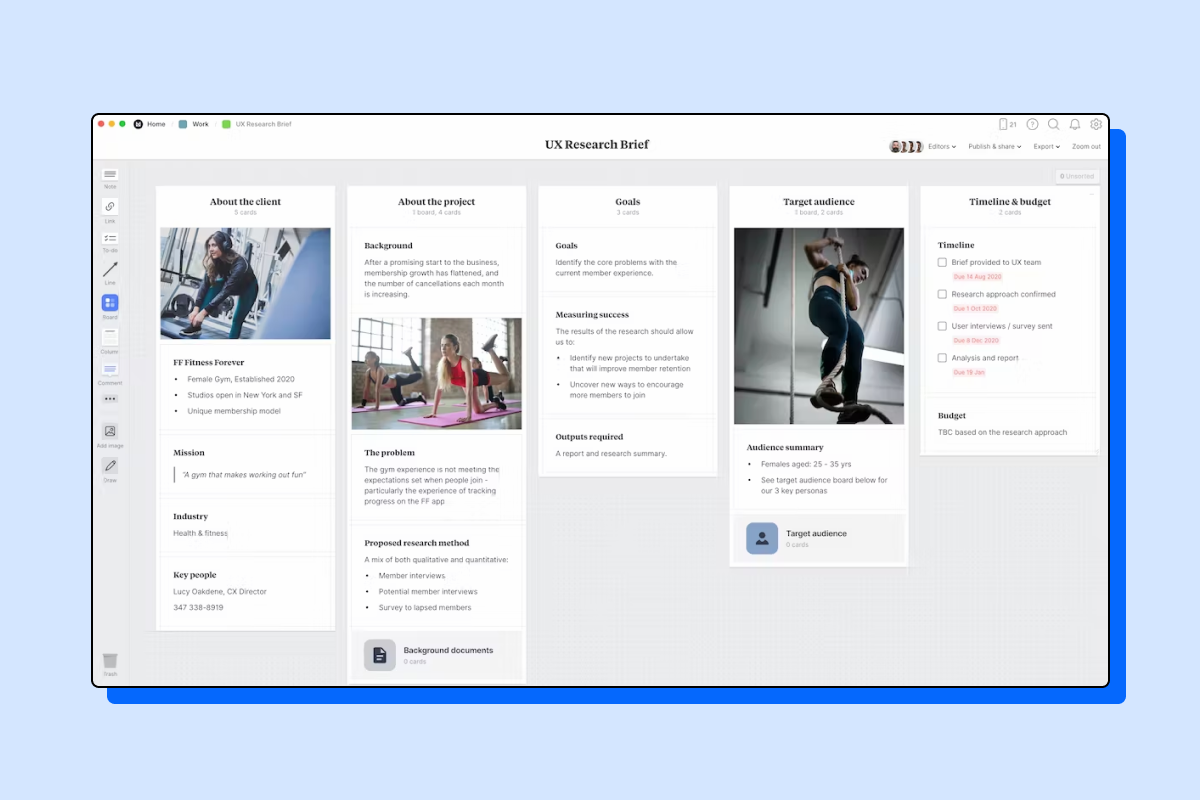
The UI design process starts with a brief
The UI design process starts by defining the problem your team needs to achieve. For that, design teams use design briefs, which provide a general understanding of what the design project is all about.
The design brief helps UI designers understand the context of their work as their job comes after the user experience has been defined and developed. It also facilitates the definition of responsibilities and deadlines, and the discussion of the project as a whole.
Inside the brief, you will see what the project is all about, including:
- Background: What's the cause behind the project? What is it about? What does it entail?
- Goals: What are you trying to get from this project? How does it benefit the user? How does it benefit the company?
- Success criteria: What metrics, KPIs, and OKRs are you using to define the project's success?
- Target audience: Who is this project targeting?
- Team structure: Who's involved in this project? What are the responsibilities for each member? Who are the stakeholders involved?
- Scope: What is the team required to do to complete the project?
- Deadline: When will this project be delivered?
Implement competitor benchmarking
Early in the process, you want to look for inspiration that your team can use for reference once they start designing the user interface.
You want to see what UI components other products use to present a screen, interaction, or user flow. Usually, you’ll be looking at companies in your industry to create design benchmarks. Sites such as Dribbble or Behance are also perfect for this job.
Let everybody in your team select any component that they like. The point of this exercise is to see the direction that each member would like to take.
Once your team has gathered some ideas, you can create an interface inventory. An interface inventory is a directory that defines all the UI elements you could use, including files from a design tool like Figma or screenshots taken from different sites, including your competitors.
In your interface inventory, you want to categorize each UI element in large groups such as:
- Animations
- Color
- Information architecture structures
- Input components (e.g., buttons, toggles, etc.)
- Informational components (e.g., tooltips, message boxes, etc.)
- Typography
Define screens and user behaviors

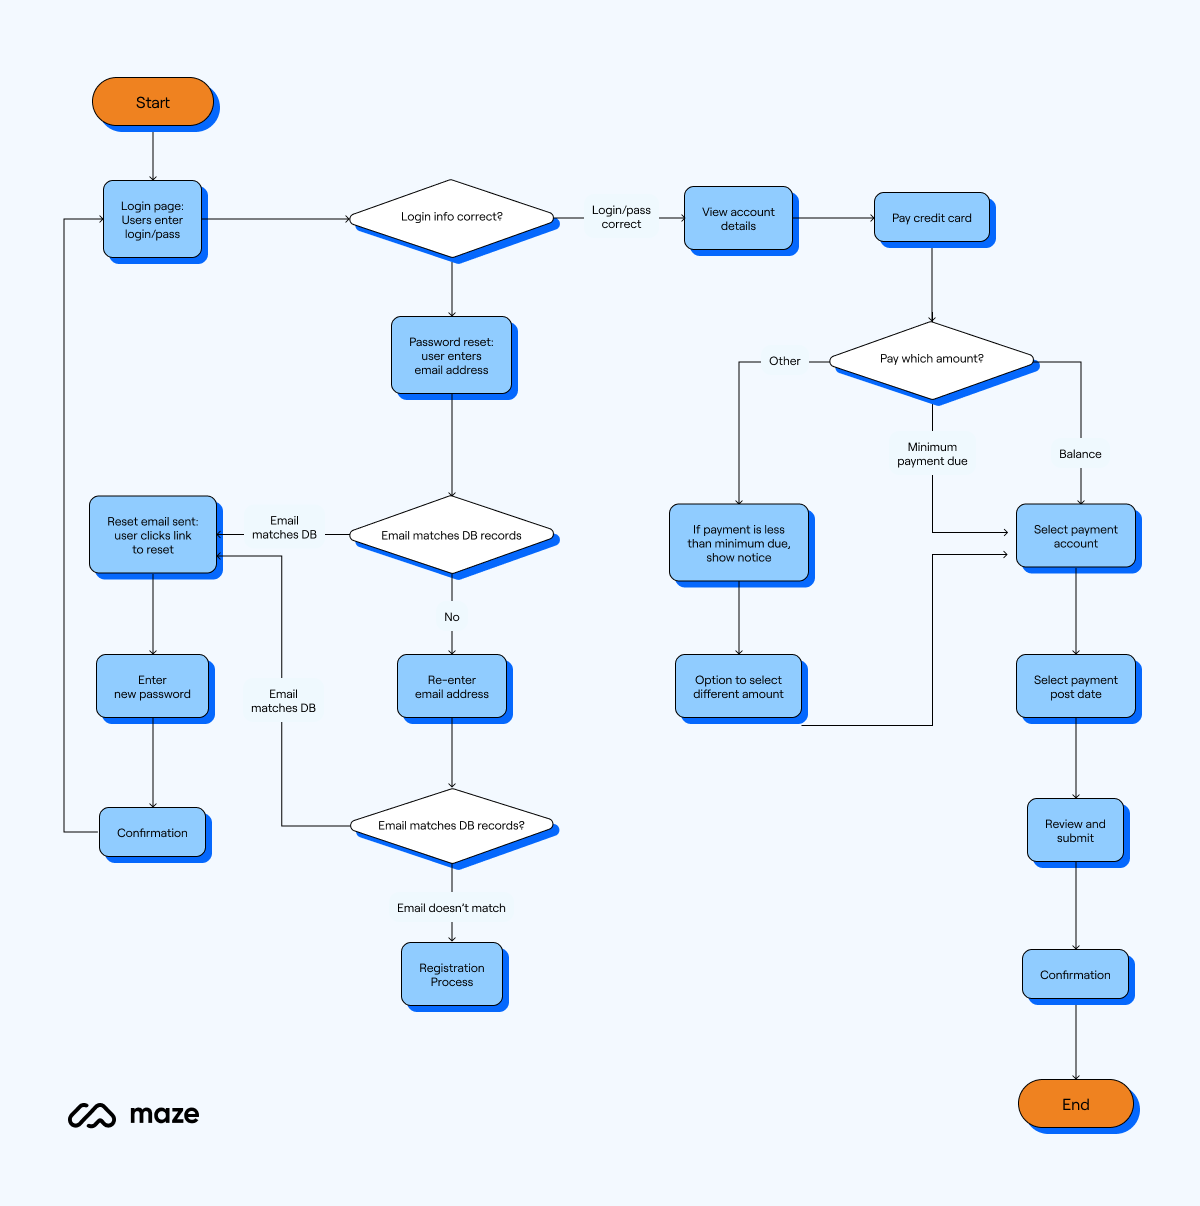
Example of a user flow
The design brief should indicate the screens your team will design your UI for; if it's not clear, discuss it with the UX designers. Your goal is to visualize everything your team needs to work on and how the screens that make up the user journey should interact according to the users' behaviors.
Note that we are talking about screens and not pages. It’s best to think about them this way because pages are associated with a web browser, whereas a screen applies to mobile devices, apps, and browsers. It also emphasizes the changes in resolutions and layouts each screen will have once they adapt to different devices.
Then, you will need to design a user flow, which shows the process a user takes to complete a given task. A user flow will help your team analyze the interactions between each screen and how the user progresses along in their journey.
While this is the focus of UX design, which is separate to the process described in this guide, as a UI designer you need to understand the user flow. Alternatively, you can work together with the UX team to clearly define it before moving forward with the next steps. Doing so will allow you to be aware of all states in the journey and design the necessary screens.
Develop sketches and wireframes

With the screens defined, your team can start creating sketches that illustrate potential screen layouts. The goal is to get a high-level idea of the different ways the interface could meet the user’s needs.
Every member of the design team should discuss and generate ideas with the relevant stakeholders to find the right combination that gets users to complete each task efficiently.Once you have defined the right sketch for each screen, you can start working on your wireframes. These are low-fidelity prototypes that define the visual hierarchy and structural guidelines of each screen.
Discuss your wireframes with the relevant stakeholders to get a better idea of the project’s development timeframe and the way the final project will look.
You can also test your wireframes with the end-user to find the best layouts and detect any critical usability problems before the development starts to create working prototypes for each wireframe.
Create and maintain a design system


Before you move onto higher-fidelity prototypes, you want to define the exact UI components you will use in them with the help of design systems.
A design system groups every UI element that will allow a design team to design and develop a product. It will evolve constantly with the product, the tools, and the new technologies available. In this sense, a design system is like a library of reusable elements that give a team clarity and consistency throughout the UI design process.
Among the several elements that make a design system, you can find:
- The colors that represent the brand
- The typography
- The imagery
Another benefit of a design system is that it gives developers a more precise input on what they are supposed to code, and stakeholders a clearer idea of the complexity of the prototypes the developers will create.
Learn more about Maze's design system ✨
Curious to learn more about what it's like to create a design system from scratch? Maze's Design Ops Manager, Alberto Calvo, wrote about what it's like to evolve a design system into a company-wide resource.
Develop high-fidelity prototypes

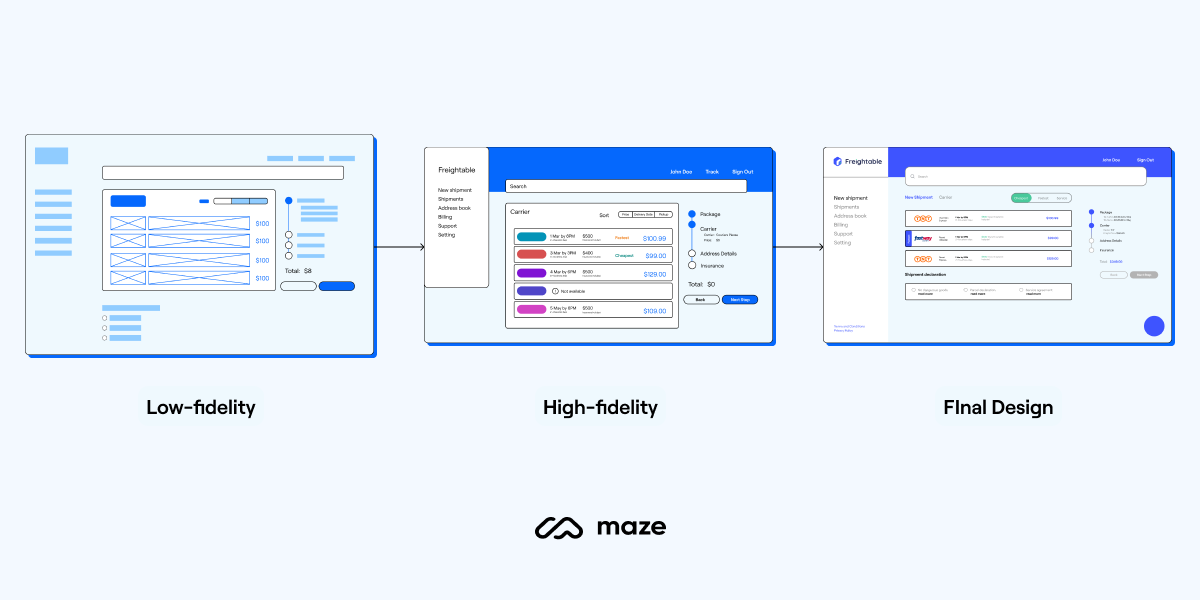
Finally, you can start creating your high-fidelity prototypes, which includes every UI element you have defined previously.
Although a high-fi prototype won’t look exactly like the finished product, the goal is to present a user flow to both your stakeholders and users that you can discuss and test.
The main difference between your high-fi prototype and a wireframe is that the former is interactive—it includes components such as page scrolling, accordions, checkboxes, and so on. It also provides elements such as the copy, graphical elements, and user flow you’d like to use once you launch your project into production.
Since high-fi prototypes look almost like the finished product, you can use them in user testing sessions and get feedback before spending any further resources in marketing and development. Although UX designers are responsible for deploying this task, UI designers can contribute with the former to respond to the user feedback quickly and create new iterations of the prototype until they have a final version.
Hand-off
Once you have finished creating your high-fidelity prototypes, it's time for the hand-off. In this final step, you present the finished product to your stakeholders and discuss the changes made.
Before you carry out the hand-off, document the specific changes made to the product, which you can do with the help of any of the major design tools such as Figma, Sketch, Zeplin, and InVision. You can also record a quick video demonstrating the interactions.
At this stage, you could receive feedback that will require you to go back to earlier stages. However, if you have received feedback throughout the entire design process, you shouldn't expect to see any large changes.
Wrap up tips
The UI design process complements the UX process, taking your early wireframes into working prototypes that aim to delight and inspire your users to enjoy your product.
Before closing, we want to share some final tips:
- Involve your stakeholders in every step along the design process. Make sure there’s a two-way relationship between the design team and the stakeholders so both can discuss the direction and changes needed. Implement the feedback received to avoid any problems in the later stages of the design and development process.
- Have feedback sessions with other designers and/or members of your company, even if their feedback doesn't carry as much weight as your project's stakeholders.
- Test your designs, such as wireframes and prototypes to avoid any usability or accessibility issues.