Is there a disconnect between your product development process and user needs? Is your team constantly trying to figure out how to build features that resonate?
The solution might lie in your user stories.
A user story is the foundation that guides your team—it’s the grounding narrative that ensures every sprint delivers value, and every product decision contributes to building a product people actually use.
Let’s start reading.
What is a user story?
A user story is a simple, clear, and relatively short description of a feature or requirement from the end user's point of view.
It’s used in product development (typically, but not exclusively, in agile product development) to ensure your design and development team has a comprehensive understanding of user needs.
User stories define the problem from the user’s perspective—they’re about building empathy with your users and aligning on a clear goal, not how to solve it.
Creating user stories is a collaborative effort. The product owner usually leads the process, ensuring stories are developed with user insights from user research (collected by UX researchers or similar). Development team members, including developers and designers, also contribute with their technical insights and refine the stories.
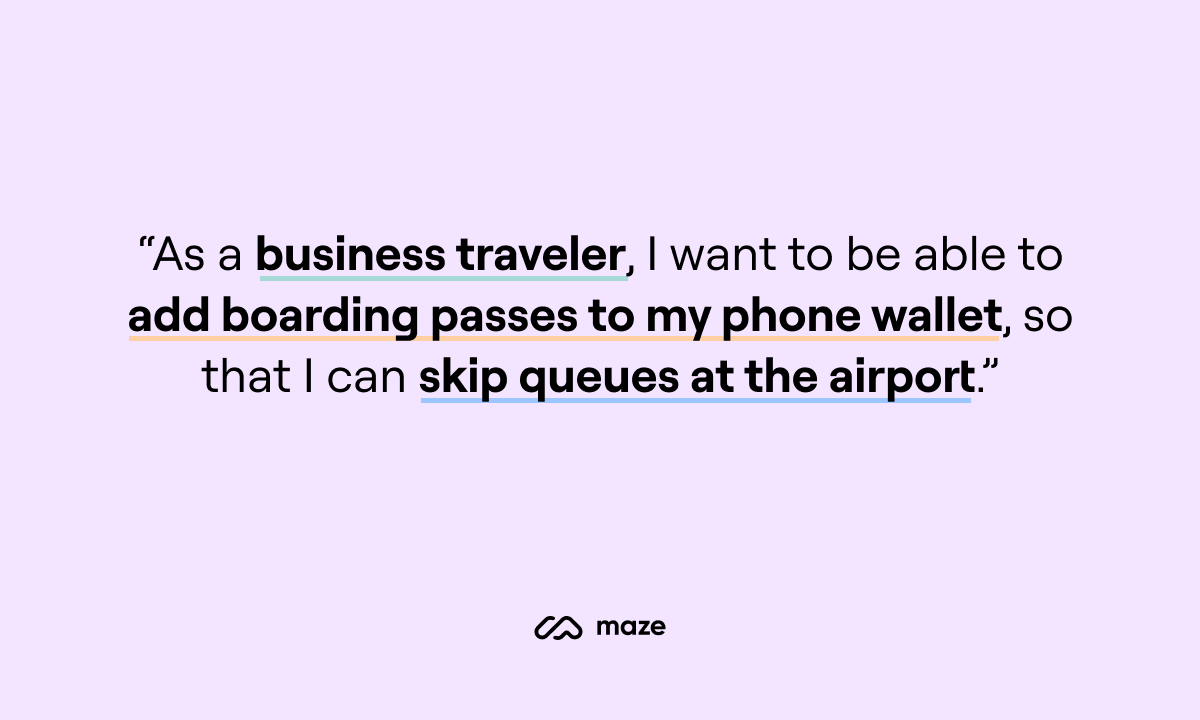
The end result is a short statement that serves as a springboard for the product development process, defining what the user’s need and goal is. For example:
📝 FYI: Although user stories are most often from the user’s perspective, they can also be from the perspective of other stakeholders, such as partners or team members.
When should you create a user story in the UX design process?
User stories are useful throughout the UX design process. They should be created before prototype testing and used during the user testing phase. Without user stories, your UX strategy can lack focus, leading to designs that don’t address the most critical user requirements.
The purpose of user stories is to guide user research and pinpoint specific areas for further insight development. They’re your ‘what’ and ‘why’, which can never come before your ‘how’. Until you know what it is you’re aiming to research and develop, you can’t get started on actually researching and developing it.
The ‘Three Cs’
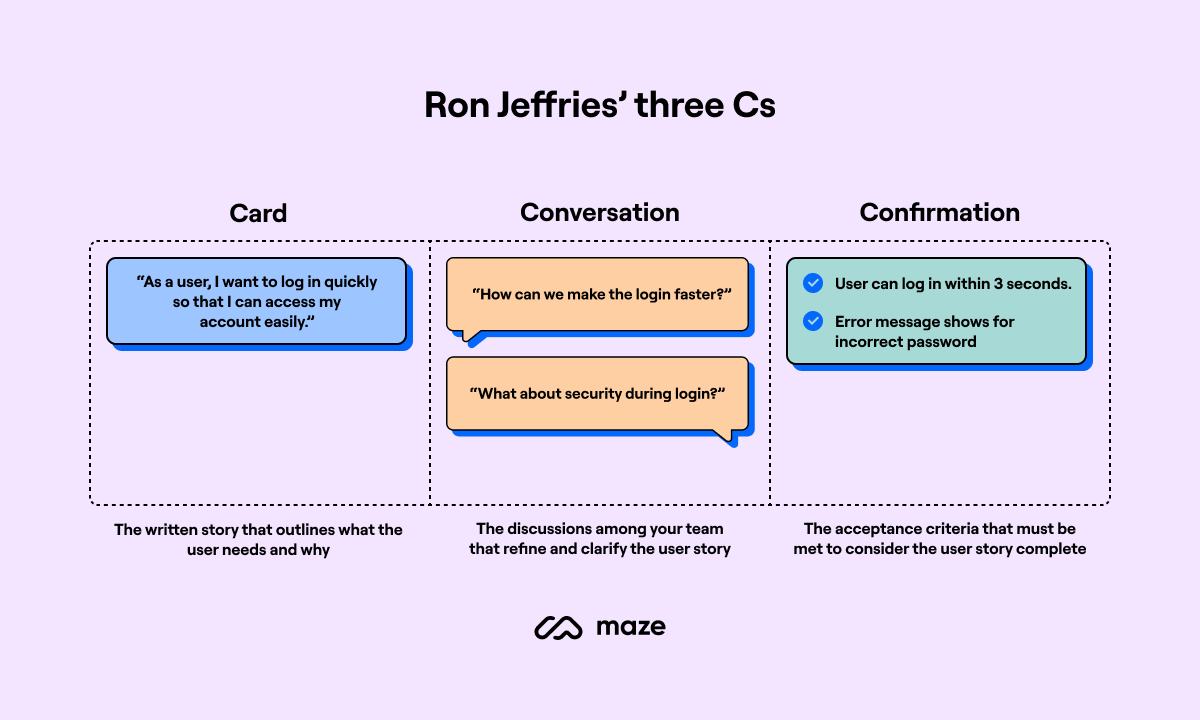
A popular approach to creating user stories is the ‘Three Cs’, developed by Ron Jeffries—one of the original creators of the Extreme Programming (XP) methodology and one of 17 co-authors of the ‘Agile Manifesto’, a foundational document for the Agile movement.
Jeffries’ ‘Three Cs’ are key to ensuring that value is well-understood and effectively delivered. The ‘Three Cs’ are:
- Card: The two-three sentences used to describe the intent of the user
- Conversation: A discussion between the target users, team, product owner, and other stakeholders to determine the more detailed behavior required to implement the intent
- Confirmation: How the customer or product owner will confirm that the story has been implemented to their satisfaction
User story formats: 4 Key examples
There are several user story formats, each of which broadly achieves the same outcome—you know what your user wants—with varying levels of detail or focus.
Role-feature-reason user story format
As a [type of user], I want [an action] so that [a benefit/a value]
The most commonly-used format, often referred to as the ‘role-feature-reason’, consists of three specific components:
- Role: Who is the user or stakeholder?
- Feature: What is the action or feature they need?
- Reason: Why do they need this feature? What's the benefit?
Example: “As a business traveler, I want to be able to add boarding passes to my phone wallet, so that I can skip queues in the airport.”
Job stories format
When [situation], I want to [motivation], so I can [expected outcome]
Job stories are ideal for your user story when context and motivation are more important than the user’s identity, e.g. if you have a broad audience but they all have similar motivations.
Example: "When I’m shopping on my phone, I want to see product images clearly, so I can decide if I want to buy them."
Problem-goal user story format
Problem: [describe issue and reason], Goal: [describe how to address it]
The problem-goal format does what it says on the tin—it clearly states the user’s problem, and their goal. Use this format if you want to be specific about what you’re solving, rather than why you’re solving it. For example, if you’ve already conducted product discovery and have a clear problem statement.
Example: "Problem: I abandoned my cart because the checkout process is too long. Goal: I don’t want to spend more than a minute checking out."
Goal-oriented user story format
I should be able to [action/goal]
Finally, we have the simplest format: goal-oriented. Opt for this user story format if you need to clearly define what the user needs to achieve. In this instant, the why and how doesn’t matter, it’s all about point-blank stating what.
Example: "I should be able to filter search results by price."
8 Steps to create a user story
To ensure your user stories drive real progress, you need a solid process for creating them. Whether you’re new to user stories or looking to refine your approach, here’s the eight steps to creating clear and actionable stories that are aligned with user needs.
- Identify the user persona
- Define the user’s needs
- Highlight values and benefits
- Outline the acceptance criteria
- Apply the criteria to your user story format
- Break down the story
- Prioritize the user story
- Review and refine the user story
Step 1: Identify the user persona
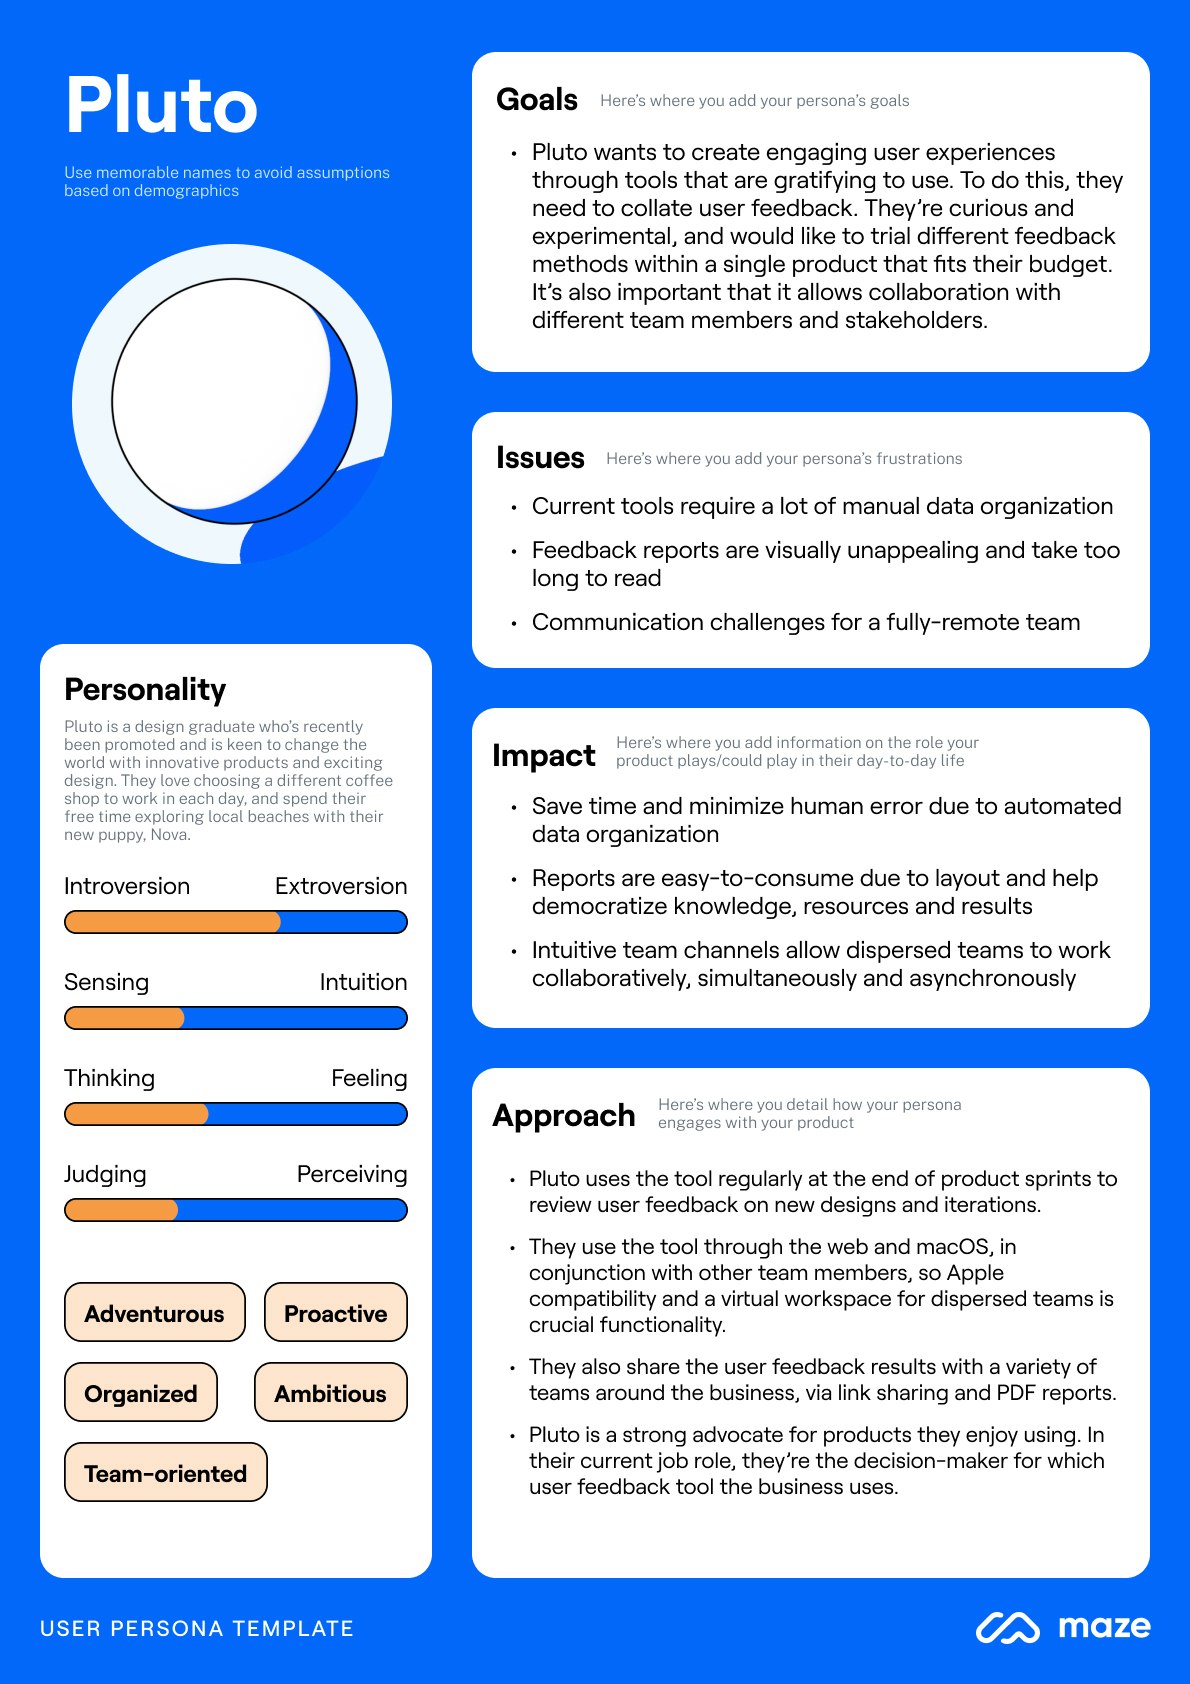
The first step in creating a user story is to clearly identify the end user for the feature or functionality. A user persona is a detailed representation of your target user, based on research and real data. It helps you understand who you’re building for, what their needs are, and what challenges they face.
You can do this in three steps:
- Research: Conduct user interviews and surveys, and analyze user data to gather insights about your users
- Define characteristics: Outline key details about your user, like demographics, behaviors, motivations, and pain points
- Create a persona profile: Give your persona a name, a job title, and a backstory that includes their goals and challenges so you can empathize with them and keep their needs at the forefront
Mike Cohn, Co-founder of Agile Alliance and Scrum Alliance, highlights the importance of focusing on user needs when writing user stories: “When creating user stories, it's best to be as specific as possible about the type of user.”
💡 Don’t know where to start? Download this free User Persona Template from Maze.
Step 2: Define the user’s needs
In this step you’ll specify what the user wants to accomplish or the problem they’re trying to solve.
You can do this solo or in a workshop with your team—start by noting observations and hypotheses about what your user’s needs are. Aim to keep these straightforward and break them down to their most basic need.
For example, if your persona is Sarah, a Sales Manager, her need might be: “I need to be able to generate sales reports fast”.
Step 3: Highlight value and benefit
This step connects the user’s need with a tangible outcome so you can ideate solutions. It adds the ‘why’ to your user story, which enables you to think of your ‘how’ further down the line.
When you explain the value, you answer: “Why does this matter to the user?” This is where you define the user’s goal.
Returning to our previous example, Sarah’s need is to ‘quickly generate sales reports’. You can use the ‘Three Whys’ techniques (asking ‘why’ three times) to drill down to the root of the need and uncover why. After asking ‘why’, Sarah’s story might sound like:
“I need to quickly generate sales reports so I can monitor my team’s performance and make data-driven decisions efficiently.”
This explanation makes it clear why the feature is important to her need and what benefit it brings, guiding the team to build a solution that truly supports her role.
At this point, you want to create markers like story cards, index cards, or sticky notes to place on a task board. These can be physical or using a digital platform like Figma, Jira, or Miro. Each card should include a brief user story that describes the user, their need, and the benefit they’re seeking. As the project moves forward, these cards can be moved across different stages of development, like ‘to do,’ ‘in progress,’ and "completed."
Step 4: Outline acceptance criteria
Acceptance criteria are specific conditions that must be met for a user story to be considered complete and successful.
These criteria act as a checklist the development team can use to ensure that all aspects of the story have been addressed. They help prevent misunderstandings by making sure everyone on the team has the same expectations for what the feature should do.
Mike Cohn highlights the importance of making testable acceptance criteria. This means the criteria should be specific enough that they can be objectively tested and validated. To this point, acceptance criteria most often includes quantitative data—it might be a usability metric, a customer experience KPI, or a stat you can pull from user feedback.
For example, if Sarah needs to generate sales reports quickly, the acceptance criteria might include time taken to generate the report.
Step 5: Apply the criteria to your user story format
This is where everything comes together to form a clear, actionable story that guides your development process. Combine your user need, value, and acceptance criteria for a complete user story:
“As Sarah, a Sales Manager, I need to quickly generate sales reports so I can monitor my team’s performance and make data-driven decisions efficiently.”
Acceptance criteria:
- The report is generated within two minutes after data input
- The report includes sales data for the specified period
- The report can be exported as a PDF
Ensure all the critical elements—who the user is, what they need, why it matters, and how you’ll know it’s done—are captured in one concise story. This format guides your development team and aligns everyone involved on what needs to be delivered and why.
Step 6: Break down the story (if necessary)
When it comes to product development, not all user stories are small enough to be tackled in a single sprint or development cycle. When a user story is large or complex, it’s often referred to as an ‘epic’. Epics consist of connected user stories which can be tackled individually in more manageable parts.
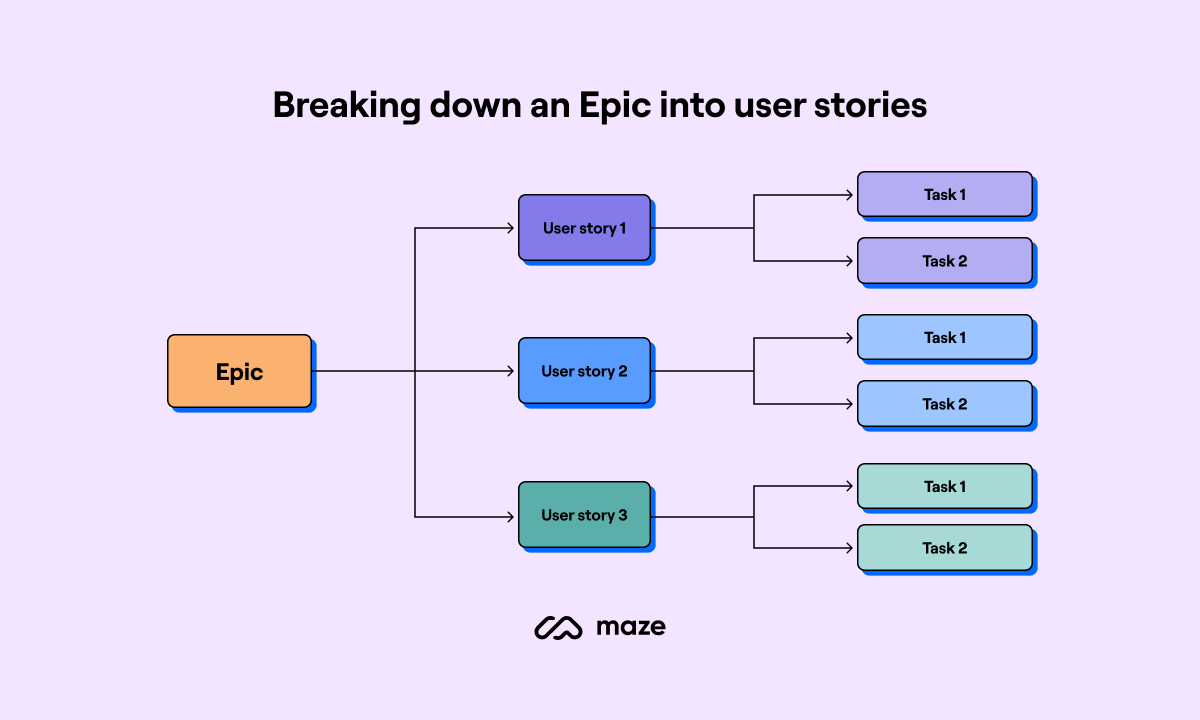
When you break down an epic into stories, it becomes easier to estimate the time, resources, and effort required for each part using story points. Story points are a unit of measure used in agile product development to estimate the relative effort, complexity, or time required to complete a task. This way, your team understands the scope of work and can plan sprints accordingly.
For example:
- A story that requires minimal effort might be estimated at two story points
- A more complex story might be estimated at five story points
- A highly complex story could be estimated at eight story points or more
When to break down a user story, or epic:
- Size: If the story is too big to complete within one sprint or development cycle, it needs to be broken down
- Complexity: If the story involves multiple features or steps, breaking it down ensures each part is thoroughly developed and tested
- Clarity: If the story has multiple user needs or outcomes, splitting it into smaller stories can make each one clearer and more focused
Remember, each subtask or feature becomes its own user story, complete with its own user persona, need, value, and acceptance criteria.
So if Sarah’s original user story is, “As a sales manager, I want to generate detailed sales reports, customize them, and share them with my team, so I can make informed decisions quickly,” this could be broken down into smaller stories:
- I want to generate basic sales reports quickly (Estimated at three story points)
- I want to customize the sales reports with specific filters (Estimated at five story points)
- I want to share the sales reports with my team via email (Estimated at two story points)
Step 7: Prioritize the user story (don’t leave it in your backlog!)
Once a user story is defined, move it to your product backlog, where it can be prioritized based on its value to the user and the urgency of the need it addresses.
In product development, the backlog can quickly become crowded with stories. Without prioritization, important tasks might get lost among less critical ones. To avoid this, assess each user story based on the value it brings to the user and the business. High-priority stories—those that solve user problems or contribute greatly to the product’s success—should be placed at the top of the backlog.
Prioritization also helps in planning your sprints or UX workflow—no matter which product management tool you use.
- In a Kanban system, high-priority stories are pushed to the front of the queue, ensuring they’re addressed quickly
- In Scrum, prioritized stories are selected during sprint planning, ensuring the team works on them in the next development cycle
- A story that delivers high value with low effort should be tackled first, providing quick wins for the product
Common assumptions to avoid when creating agile user stories
It's easy to fall into certain assumptions that can undermine the effectiveness of your development process. These assumptions or biases might seem harmless, but they can lead to misunderstandings, misaligned priorities, and even failed projects.
Some assumptions to avoid are:
- User stories are only for developers: User stories are for the entire team, including designers, testers, and stakeholders, to ensure everyone understands the user’s needs and goals.
- One story addresses all users: Different users have different needs. One story should focus on a specific user persona or scenario, not everyone.
- Acceptance criteria cover all circumstances: Acceptance criteria define what’s needed for a story to be complete, but it might not cover every possible edge case. Consider whether critical cases could require additional user stories.
- User stories are only about features: User stories can also describe non-functional requirements like security or user experience needs.
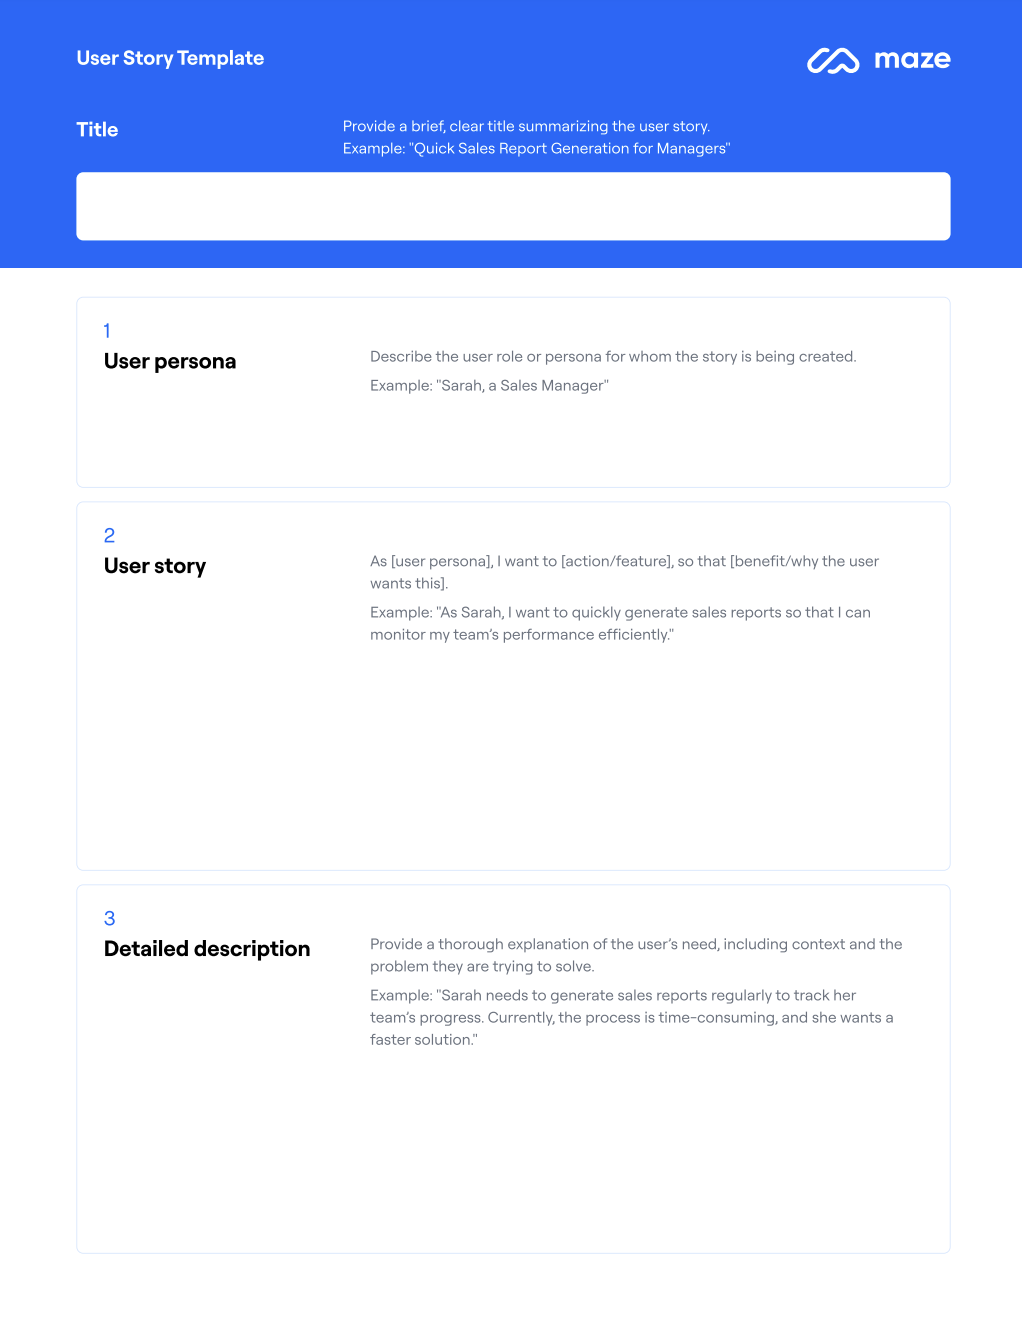
Get your free user story template
You’re now ready to start building your own user stories. But why start from scratch when you can get a head start?
We’ve put together a free user story template that you can download and use right away. This template includes all the essential elements, ensuring you’re set up for success from the very first story.
Don’t just write user stories—create ones that drive real results.
Our free template is designed to help you craft stories that are clear, actionable, and valuable.
Download your free User Story Template
Use Maze to validate user stories with real user insights
Creating user stories is only one stage in truly understanding your users and designing user-centered products that drive business results.
To ensure these stories reflect your users’ needs, you need a user research platform that can validate your assumptions, deliver user insights, and keep pace with your product development.
As a holistic UX research platform, Maze offers built-in participant recruitment, automated reports, and a comprehensive suite of user research methods to inform your user stories–including Prototype Testing, Surveys, User Interviews, and more.

