


TL;DR
Testing Figma prototypes before development helps you catch usability issues early, when they're less costly to fix.
To test Figma prototypes, you need to define clear tasks and objectives, recruit the right participants, and analyze both quantitative metrics and qualitative feedback.
Maze simplifies Figma prototype testing by letting you import Figma prototypes directly, set up tests in minutes, and access automated reports with usability scores, heatmaps, and AI-powered thematic analysis as participants complete tests.
Testing Figma prototypes means stress-testing very tangible details. This includes the wording on buttons and form fields (‘Save draft’ vs ‘Continue’), how navigation is grouped, and how the same flow behaves on desktop vs. mobile.
In this guide, we cover everything you need to validate your Figma designs with confidence. You'll learn practical testing methods, common pitfalls to avoid, and how tools like Maze can help you gather actionable feedback in a few hours.
Why is Figma user testing important?
Figma user testing matters because design decisions made in a file don’t always match how people actually try to complete tasks. You might think you’ve built a user-friendly flow or product, but users arrive from different entry points, skim the screen, and make fast decisions. Testing helps identify and validate your designs with the people who will use them.
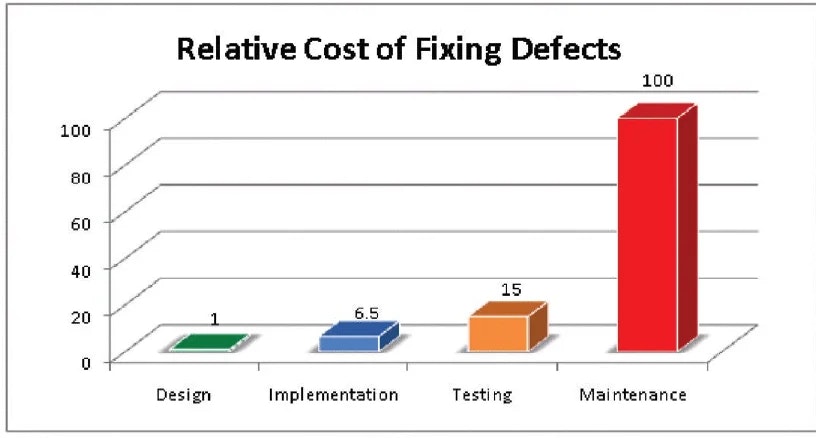
According to research from IBM’s Systems Sciences Institute, fixing a bug during implementation is estimated to be around six times more expensive than catching it in design, and fixing it after release can be four to five times more expensive again. Across the full lifecycle, some defects can cost up to 100 times more than if they’d been addressed during the design phase.
That means, a usability issue that could have been caught in a $100 prototype test might end up costing $10,000 or more to fix once it reaches production.

Here are some of the design decisions you can validate with Figma user testing:
- Navigation patterns: Test whether users can find what they're looking for through your menu structures, tab bars, and navigation hierarchies. You'll see where people expect to find features and whether your information architecture matches their mental models.
- User flows and task completion: Validate complete user journeys from start to finish, like signing up for an account, completing the checkout process, or booking an appointment. Testing flows reveals where users drop off, take unexpected paths, or repeatedly hit the same roadblocks.
- Micro-interactions and UI feedback: Evaluate the small details that make interfaces feel responsive, like button hover states, loading animations, form validation messages, and transition effects.
- Information hierarchy and visual design: With high-fidelity prototypes, you can test whether your visual hierarchy guides users effectively and whether your design meets brand standards while optimizing usability.
💡 Testing early, even with ‘imperfect’ prototypes, helps you validate the direction before you polish every edge state. For a deeper dive on how prototype testing fits into the wider research workflow, read our prototype testing guide.
Ways to test Figma prototypes
How you test Figma prototypes depends on the question(s) you need answered. Are you validating if a new flow works end-to-end, choosing between two layouts, or trying to understand how people talk about a problem?
Different types of prototype testing provide you with different insights, and you can often mix more than one in the same study. Here are some popular methods for testing Figma prototypes:
- First-click testing: Measure where people click first when they try to complete a task. It shows whether your visual hierarchy and navigation labels naturally direct them to the right starting point.
- Wireframe testing: Run quick tests on low-fidelity wireframes early in the design process. This validates layout, information architecture, and basic user flows before you invest in high-fidelity designs.
- Task-based usability tests: Ask people to complete realistic task scenarios in your prototype and observe how they move through the flow. This is the core method for Figma prototype testing, and surfaces friction, confusion, and dead ends.
- Prototype-led user interviews: Bring the prototype into a live interview and ask participants to think aloud as they move through it. This reveals expectations, mental models, and the moments where the user flow doesn’t match what they expect.
- Preference tests: Run quick preference tests on key screens. Show two or more variants of a key screen, layout, or message and ask which they prefer and why.
- A/B testing prototypes: Create separate Figma prototypes for each version of a flow and send different versions to different participants. Compare outcomes like task success or primary CTA clicks.
- Content-focused tests and microcopy reviews: Ask people what they think will happen before they click, or how they interpret a message in a real situation. This checks whether labels, messages, and microcopy are clear, accurate, and reassuring.
Once you know what you want to achieve, the focus shifts to running the test itself: recruiting the right people, setting up tasks, and analyzing what they do.
In the next section, we’ll break down how to test Figma prototypes step by step.
How to test Figma prototypes step-by-step
Testing your Figma prototype follows a structured process, whether you're running moderated research sessions or deploying unmoderated tests. Here's how to set up and execute a prototype test from start to finish.
💡 We cover how to test prototypes in Maze later in this article. Jump ahead to see exactly how prototype testing works with Maze.
Step 1: Prepare your Figma prototype for testing
Open your prototype in Figma. Go to the file with the flow you want to test, select the starting frame, and click the ‘Play’ button in the top-right corner to open the prototype.
First, run through the prototype yourself as if you were a participant. Click through the key paths and edge cases, and check that all screens are connected, interactive elements behave as expected, and there are no dead ends, broken links, or missing interactions.
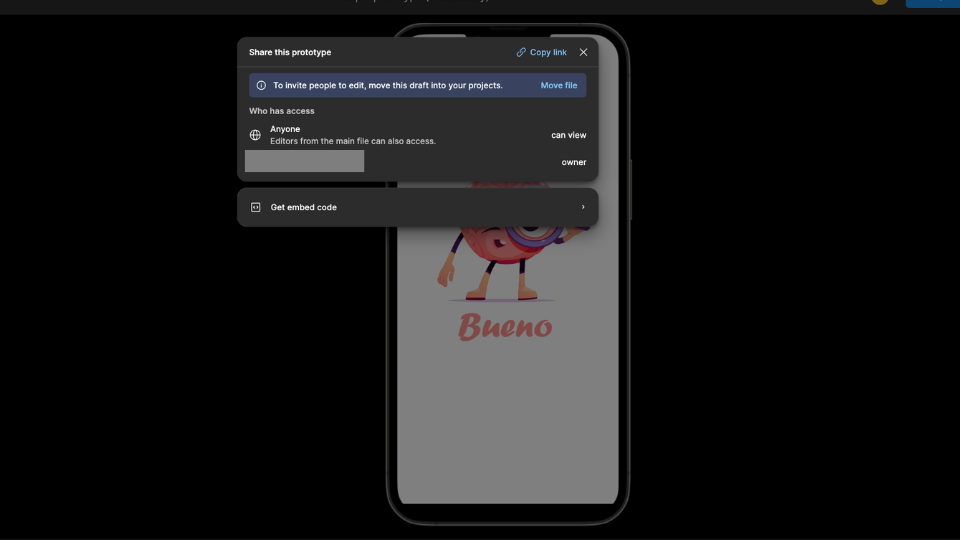
Once everything works as intended, click ‘Share prototype’ in the toolbar.
In the ‘Share settings’ modal, set Link access to ‘Anyone with the link’ so participants can open the prototype without a Figma account or special permissions. Copy the share link; this is what you'll use to deploy your test.

Step 2: Build a test scenario or task list
Here’s where you clarify what you want to learn from testing, and create a testing scenario focused on answering your research question. Are you validating navigation patterns, measuring task completion rates, or gathering feedback on visual design? Your test objectives determine which tasks you'll ask users to complete.
Write a short testing script with clear, realistic task scenarios that mirror how users would actually interact with your product.
For example:
❌ "Click the checkout button."
✅ "You want to purchase the blue sneakers in size 10. Complete the checkout process."
The first instruction tells people exactly what to do, so you only learn whether they can follow directions. The second sets a goal and lets them decide how to reach it, which shows how they naturally navigate your interface and whether they can find key actions on their own.
Make sure each task matches a specific feature or flow you are evaluating, so you can tie what you observe back to a clear objective. You can also add constraints, such as limited time, mild distractions, or slightly incomplete information, to see how your prototype performs when participants are not fully focused or perfectly guided as they are in a scripted test.
Step 3: Deploy test (moderated/unmoderated)
Choose between moderated and unmoderated testing based on your prototype's fidelity and what you need to learn.
Moderated testing works best when you need qualitative insights, are testing low-fidelity wireframes that require explanation, or want to ask follow-up questions in real-time. You'll guide participants through tasks in-person or via video call, observing their behavior and probing deeper when they encounter issues.
Unmoderated testing is ideal for high-fidelity prototypes that need minimal explanation. Participants complete tasks independently in their own time, which lets you collect feedback from dozens of users simultaneously and gather results within hours. This approach works well when you need quantitative data quickly, like task completion rates, time on task, drop-off points, or click paths, or when you are testing with users in different locations and time zones.
For unmoderated tests, you'll import your Figma prototype link (from step 1) into your testing platform, define task scenarios, and recruit participants who match your target audience. Then, participants take your test without your supervision.
For moderated tests, you need to start each session by either sharing your screen and walking through the prototype yourself or sending the prototype link so the participant can click through. Then follow your usability testing script. Introduce the session, give them each a task in turn, ask them to think aloud, and take notes on where they hesitate, get stuck, or take unexpected paths.
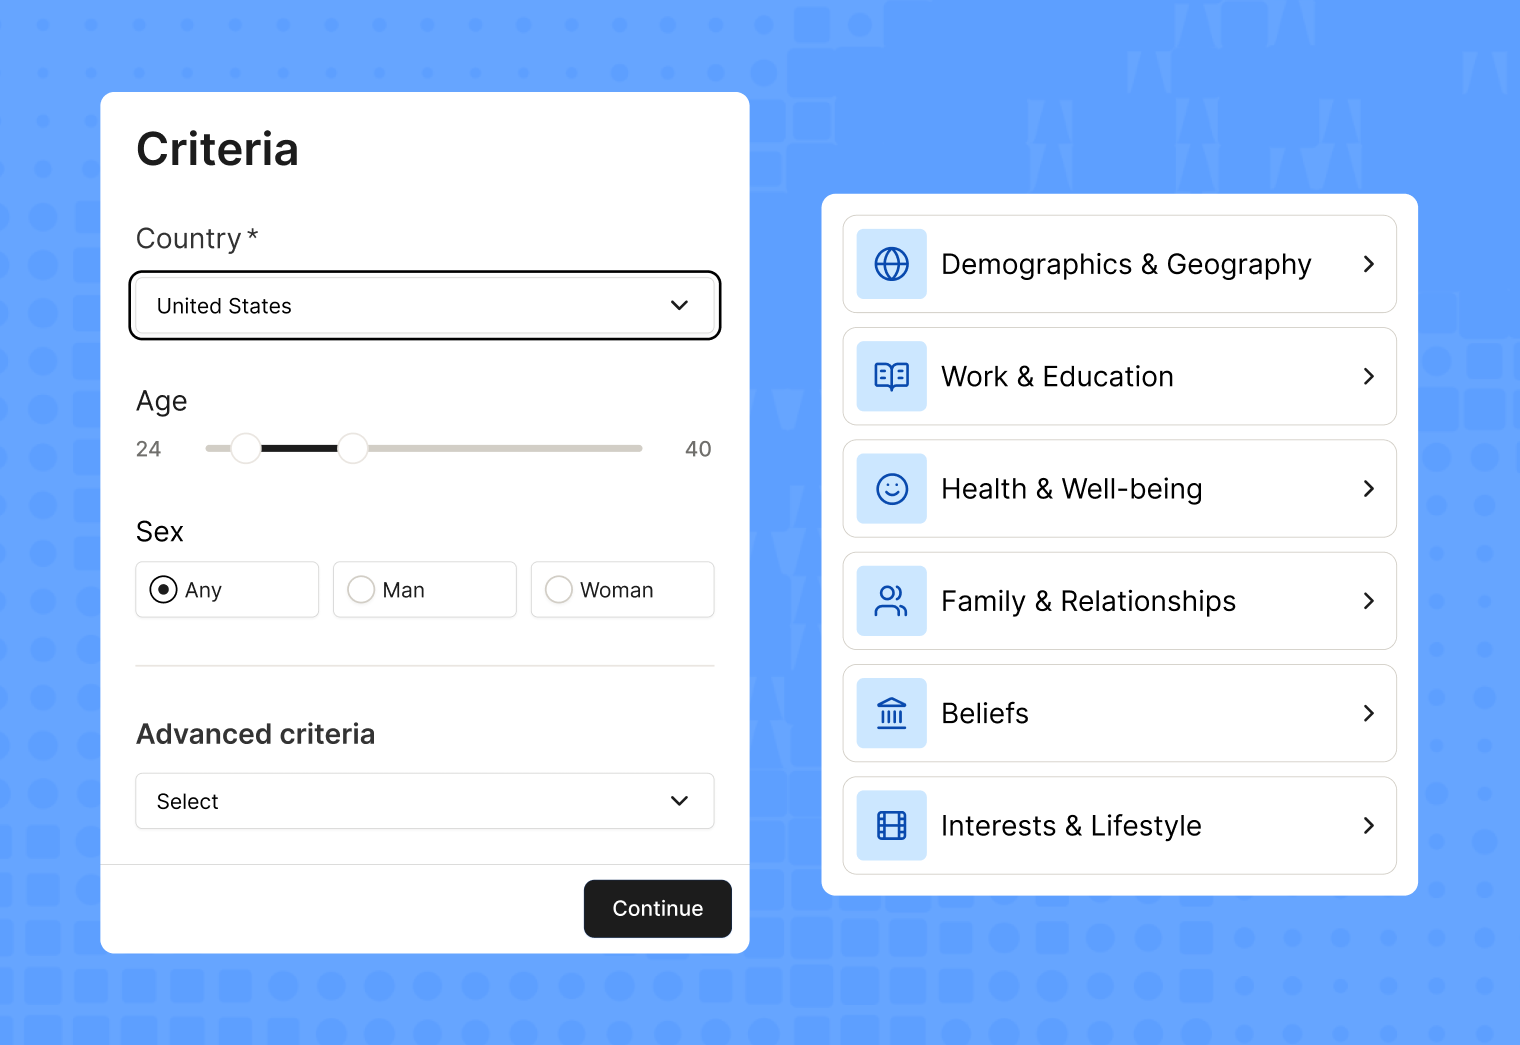
💡If you’re using a user testing tool like Maze, the Maze panel gives you access to millions of verified participants you can filter by demographics, behavior, and experience. And Maze Reach lets you recruit and manage your own users, like existing customers or email subscribers, directly within the platform. You can also set up screening questions to filter participants based on demographics, behaviors, or specific experience, ensuring you're testing with people who represent your target users.
Step 4: Collect and analyze testing results
Once your sessions are complete, bring your data into one place. For each task, check how many people completed it, where they dropped off, how long it took, and which paths they used. In moderated studies, review your notes and key moments in the recordings. In unmoderated studies, focus on heatmaps, click paths, and written feedback to spot obvious friction.
Then move from individual observations to patterns. Group similar issues, quotes, and behaviors into themes such as “navigation labels are unclear” or “error states are easy to miss.”
Note how often each problem appears and how much it affects task success. Turn these themes into a clear list of design actions, like what to fix now, what to test again, and what to keep in mind for a future iteration.
Step 5: Share with stakeholders based on findings
Once you've analyzed your results, it's time to share insights with stakeholders and decide on next steps. This is a crucial part of getting buy-in for the insight-led actions you’ve identified for optimizing your product. Tips for sharing your research and getting buy-in include:
- Speak stakeholders’ language: Frame insights in terms of conversion, adoption, support volume, risk, or time saved
- Focus on impact: Highlight problems that block critical tasks or affect many users, not every minor irritation you saw
- Connect to business goals: Tie each key finding to goals the team already cares about, like signups, activation, retention, or revenue
- Show evidence, not opinion: Back each point with a short clip, screenshot, quote, or simple metric such as task success or time on task
- End with clear next steps: For each key issue, list the proposed change, the owner, and when it will be picked up
Common challenges and mistakes when testing Figma prototypes
Even experienced designers run into challenges when testing prototypes. Understanding these pitfalls upfront saves you time and helps you gather more reliable feedback from participants.
Testing without clear objectives
Starting a test without specific goals leads to vague, ineffective feedback. Define what you're validating upfront, whether it's navigation patterns, task completion rates, or visual hierarchy. Opt for specific research questions like "Can users find the checkout button within 30 seconds?"
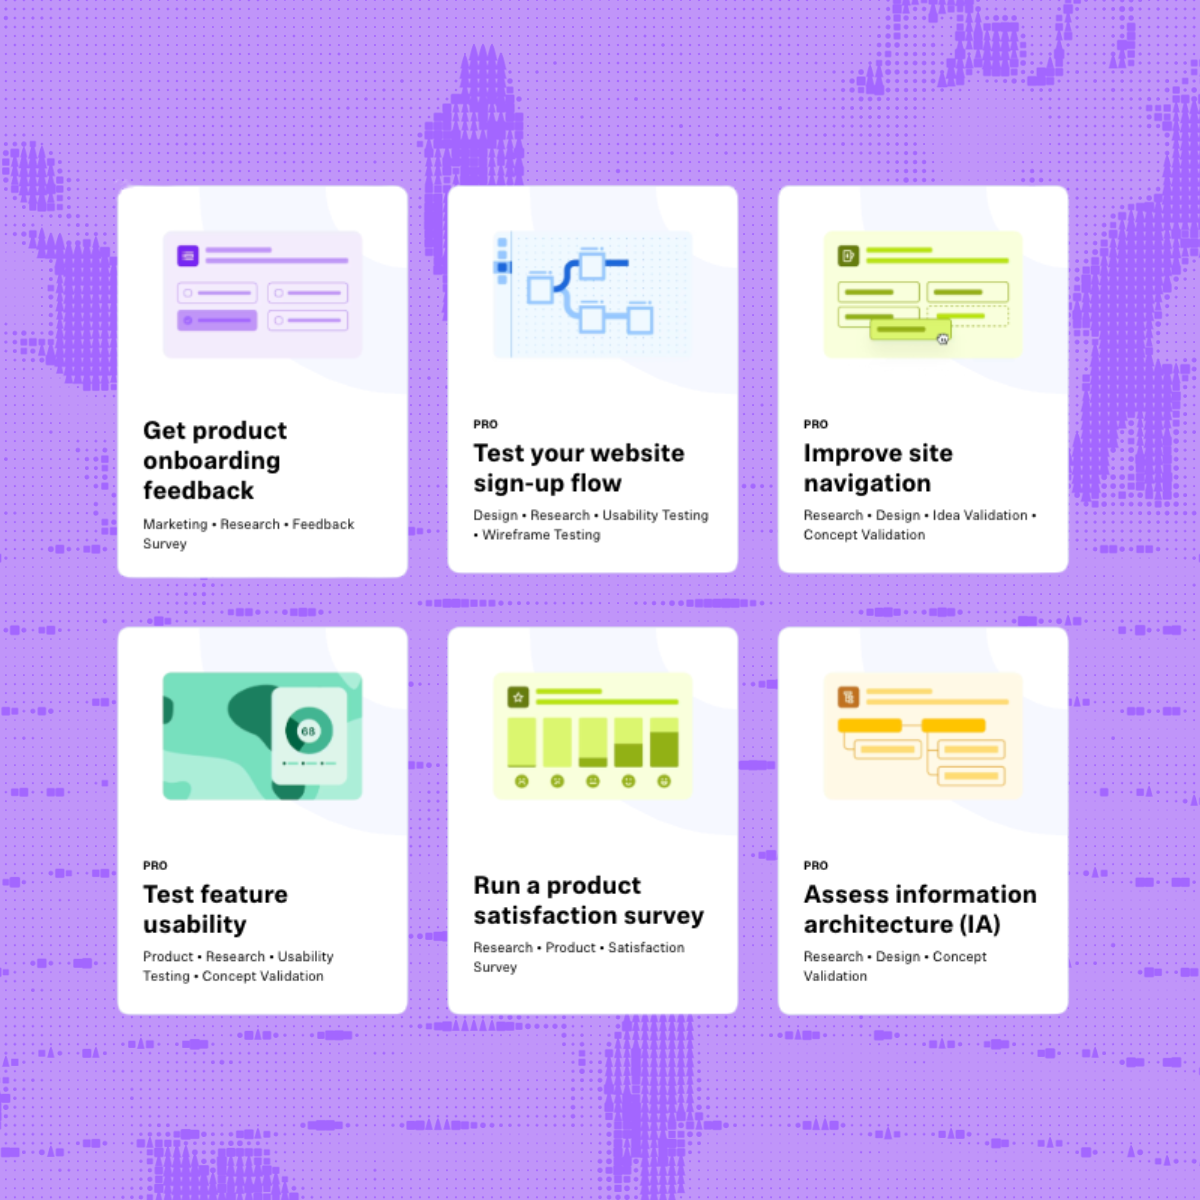
Maze's template library includes pre-built test structures for common objectives like onboarding flows and checkout processes, guiding you through setting up clear tasks and success metrics.

Large file sizes and performance issues
Figma files with unnecessary pages or unoptimized images cause slow loading times that frustrate testers and skew results. Very tall frames can fail to display on iOS devices entirely, blocking participants from completing your test. Create a dedicated testing file with only essential frames and compress images before uploading.
Maze alerts you if your file might cause performance issues and provides detailed optimization guidance before you launch.
Broken or incomplete prototype flows
Missing links between screens or dead-end interactions leave testers stuck and unable to complete tasks because the prototype doesn’t function properly.
Preview your prototype in Figma and test every interaction yourself before sharing, navigating through each flow exactly as a participant would. Maze validates that your starting point is properly configured and shows you the exact experience testers will see before you launch.
Vague or overly complex tasks
Unclear instructions like "Explore the page" give participants no direction, while overly complicated multi-step tasks cause fatigue and rushed responses. Both produce unreliable feedback that doesn't reflect real user behavior.
Write specific, realistic scenarios like "You need to report a billing error. Find and describe the process you would follow". Keep tasks focused on 3-5 key flows.
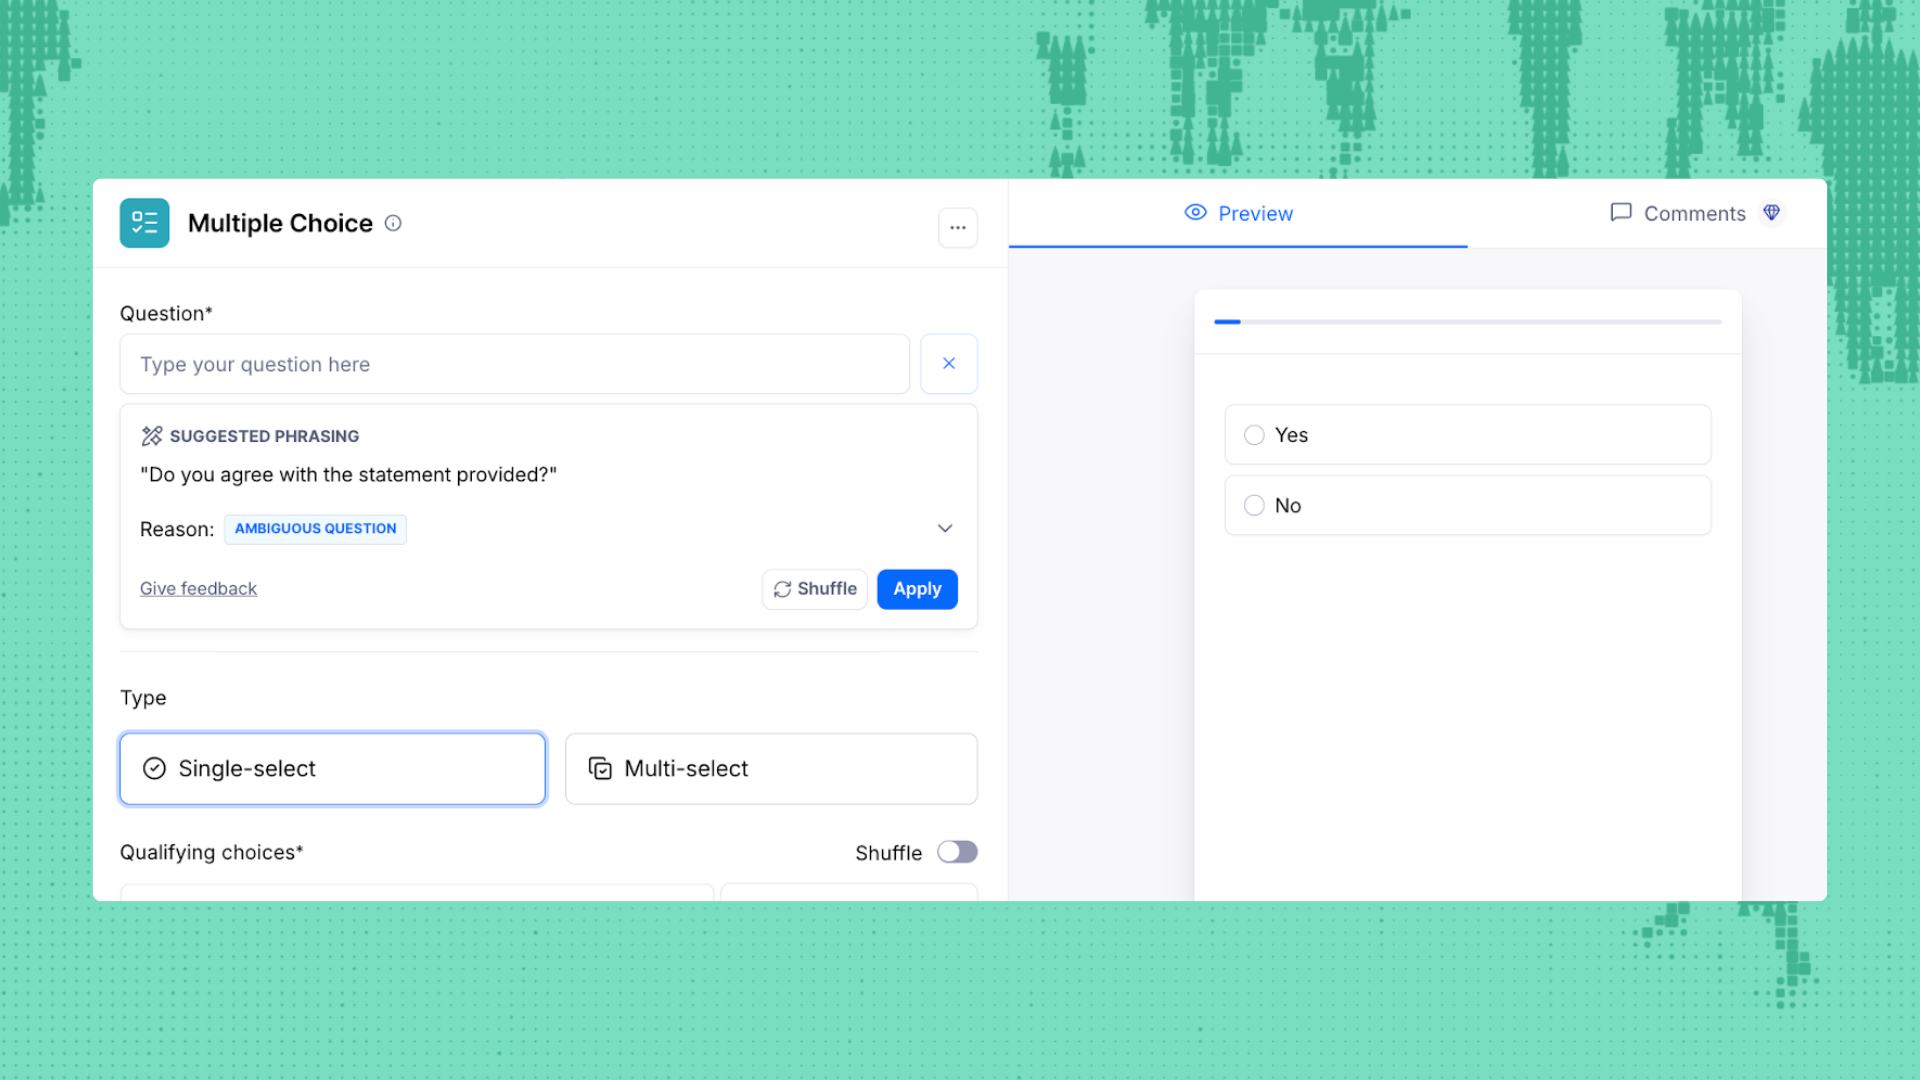
Maze's task builder includes example wording and suggested phrasing as you write, so you can see if participants follow the intended flow.

Not iterating based on findings
Running a test but failing to act on findings means you're collecting data without improving your design. Testing is only valuable if it leads to iterative improvements. Start by rating each issue on two things:
- How badly it blocks the task (for example: users can’t complete it at all, they complete it but struggle, or it’s just an annoyance)
- How often does it show up across participants
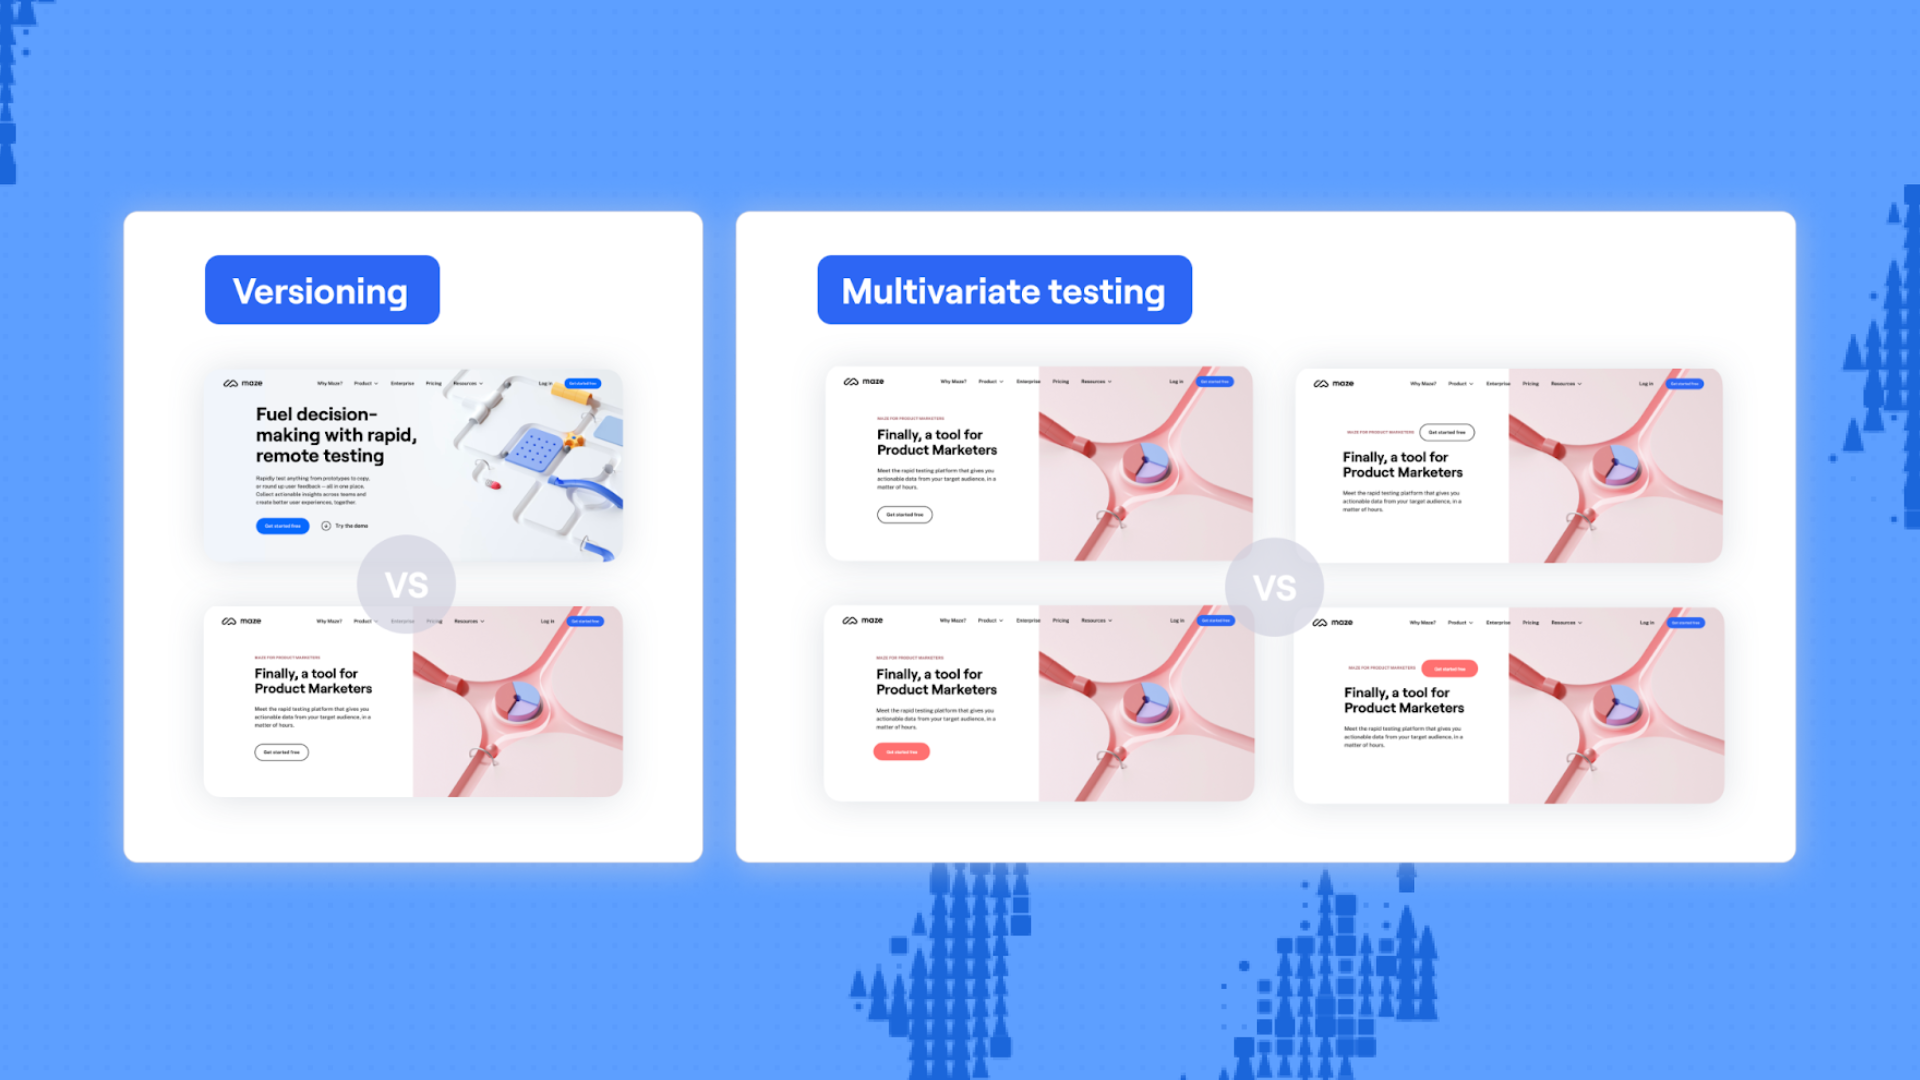
Maze's version comparison feature lets you test multiple iterations and compare metrics side-by-side, showing you exactly how changes impacted task completion rates, time on task, and user satisfaction.

Testing Figma prototypes with Maze
In the previous section, you saw how to plan and run Figma prototype tests in general. Now we’ll look at how that workflow works in Maze, importing your Figma prototype, scripting tasks, recruiting participants, and turning the results into a shareable report.
Step 1: Create a new maze and add a prototype test block
Log in to Maze and open your Projects dashboard. Open an existing maze or create a new one by clicking ‘Create new maze.’
In the blocks list on the left-hand side, click ‘Add block’, then select ‘Prototype test’ from the dropdown. This is where you'll import your Figma prototype and set up your test tasks.
If you want to compare multiple design variations side-by-side, choose ‘Variant comparison’ instead—this lets you test different versions of the same flow and see which performs better.

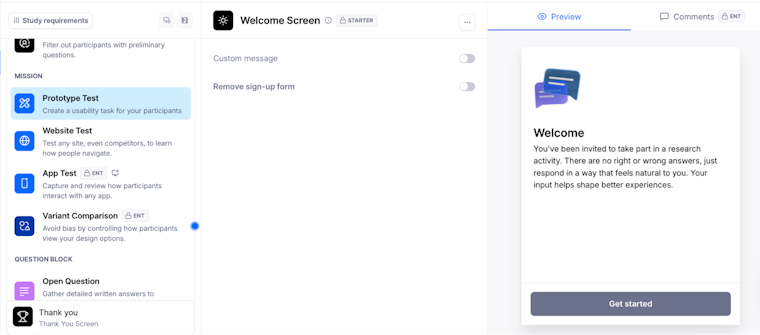
Setting up a Prototype Test in Maze with a welcome screen for participants
Step 2: Import your Figma prototype
Click ‘Add prototype’ in your prototype test block. If this is your first time importing from Figma, select Figma as your default prototyping tool.
Paste your Figma prototype link into the field. Make sure your Figma file permissions are set to ‘Anyone with the link can view’—otherwise the import will fail. If you're importing for the first time, you'll be prompted to log in to your Figma account and authorize Maze to access your prototypes. You can also validate AI prototypes in Maze with real users before they reach production.
Once your prototype finishes loading in the preview, click ‘Import.’ The prototype is now linked to your maze and will appear in all prototype test blocks you add.

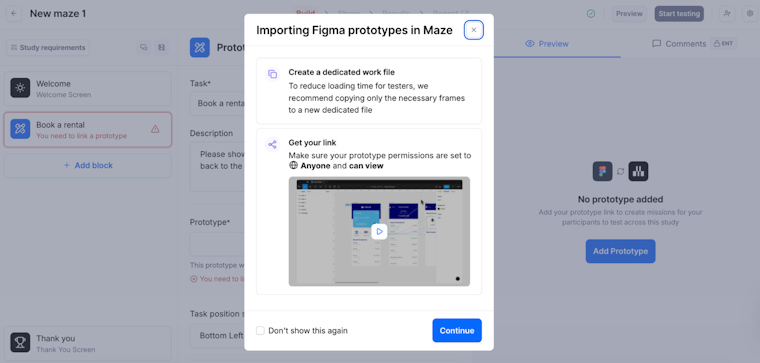
Importing a Figma prototype into Maze and checking file and link settings
💡 If your Figma file is too large to import through the standard flow, use the Maze plugin for Figma. Install the plugin, copy the plugin link from Maze, paste it in the Figma plugin, select which flows to import, and the prototype will load into Maze automatically.
Step 3: Define your task and set the start screen
Write your task in the text field—this tells participants what you want them to accomplish. Add an optional description if participants need additional context or instructions to complete the task. Keep tasks focused and realistic to mirror how users would actually interact with your product.
Click the ‘Settings’ icon in the top right to select your start screen if Maze didn't automatically detect the correct one. You can also adjust prototype scale and add password protection from this settings menu.

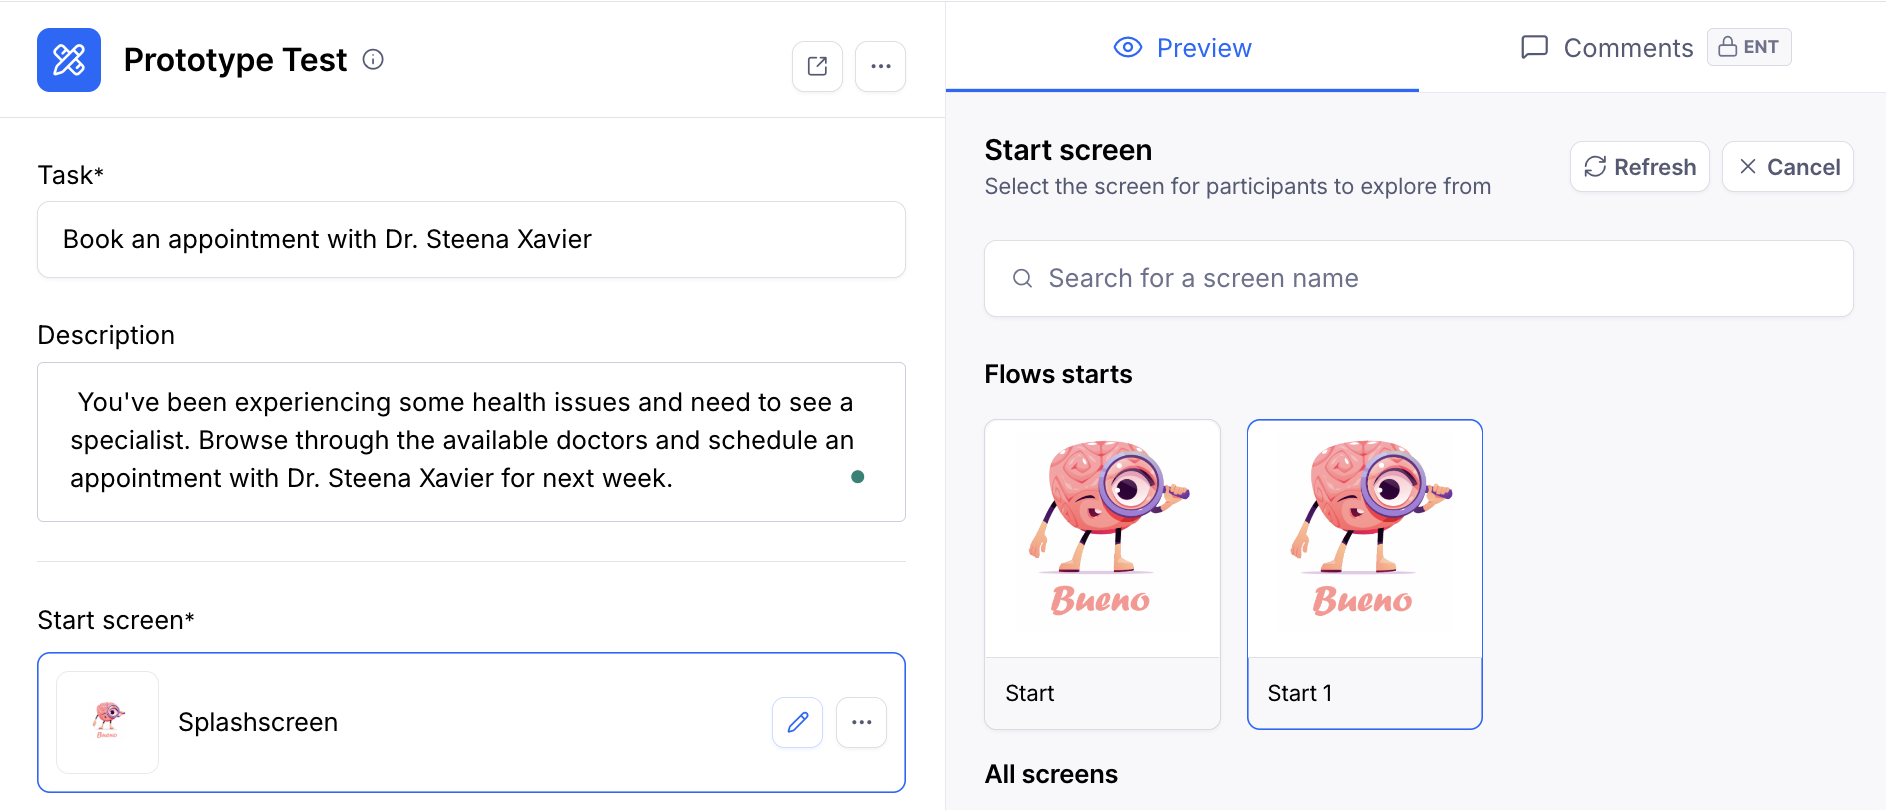
Defining the task and selecting a start screen in a Maze Prototype Test
Step 4: Choose your test type
Maze offers different test types based on what you're trying to learn.
Goal-based testing compares how people move through your prototype against an ideal or expected path. Set an expected path by clicking through your prototype in the order you anticipate users will follow—Maze tracks whether participants take the direct route or deviate.
Free exploration lets participants explore your prototype without a predefined goal. This works well for early-stage concepts when you want to understand how users naturally navigate without guidance.

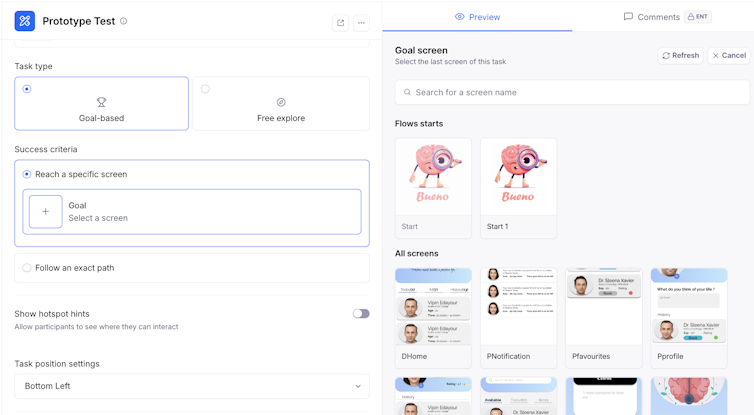
Configuring the participant task and selecting the flow's start screen in Maze.
Step 5: Add follow-up questions
Below your prototype test block, click ‘Add block’ to include follow-up questions. You might add:
- Open-ended questions to understand participant reasoning
- Rating scales to measure satisfaction or clarity
- Multiple choice questions about preferences or expectations
Maze's AI-powered follow-up questions can automatically generate contextual questions based on participant behavior, asking different questions depending on whether they succeeded or struggled.

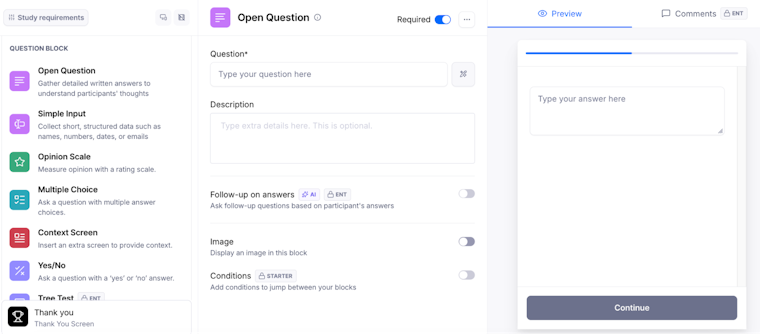
Adding follow-up blocks and AI-powered questions to your Maze test
Step 6: Preview and launch your test
Click Preview in the top right to see exactly what participants will experience. Test the prototype yourself to ensure all interactions work correctly and tasks are clear. When you're ready, click ‘Go Live’ to publish your maze.

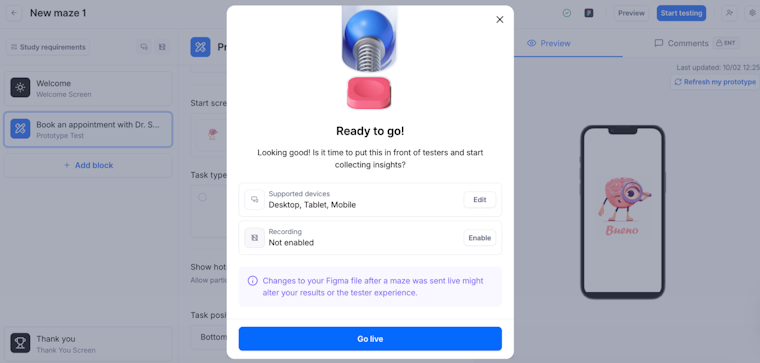
Previewing and publishing your Maze prototype test
This is also when you’ll choose how you'll recruit participants.
If you use Maze panel, you place a panel order for the maze you just set up, choose your targeting filters and screener questions, and Maze automatically delivers the study to panel participants who match your criteria as they qualify.
If you use Maze Reach, you create an email campaign to a segment in your Reach database, and Maze sends those testers a link to the same maze. In both cases, participants receive the test you have just created and complete it on their own device; new responses appear in your results as they come in.

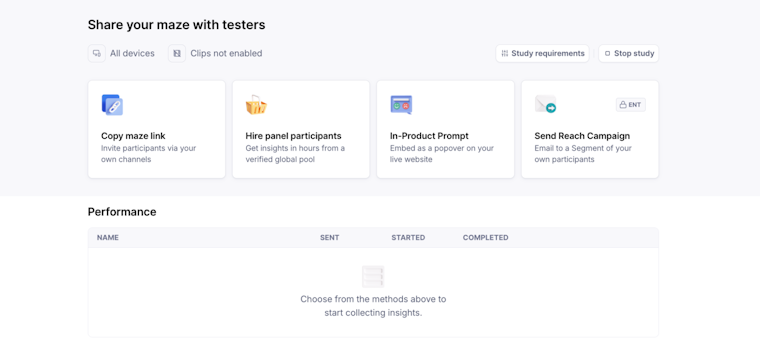
Set up targeting filters or launch an email campaign to begin your study
Step 7: Analyze test results
Once testing is complete, you must review both quantitative metrics and qualitative feedback to understand what's working and what needs improvement.
Maze automatically generates UX reports that include:
- Task completion rate: The percentage of users who successfully completed each task without errors or assistance
- Time on task: How long users took to complete specific tasks, indicating efficiency and potential friction points
- Misclick rate: How often users clicked incorrect elements before finding the right path, signaling confusing navigation or unclear visual hierarchy
- Direct vs. indirect success: Whether users completed tasks on their first attempt (direct) or after backtracking and exploring (indirect)
- Heatmaps: Visualizations showing where users clicked most frequently, revealing whether your visual hierarchy guides attention effectively
AI-powered thematic analysis automatically analyzes qualitative feedback from open-ended responses. Maze AI groups responses by themes, identifies patterns, shows sentiment trends, and key findings. You'll see logical theme names, the percentage of responses sharing each theme, and supporting quotes, making it easy to understand user priorities and pain points at a glance.
Step 8: Share findings with stakeholders
Maze makes it easy to share findings without requiring stakeholders to have a Maze account. You can:
- Share a public link that anyone can access to view results and heatmaps in real-time
- Embed reports directly into Notion or Confluence
- Export as PDF or CSV for presentations and custom analysis
Enterprise users can also create private links that restrict access to authenticated team members only. Maze reports include built-in commenting functionality so team members can add feedback to specific screens, start discussion threads, and tag colleagues directly within the report.

Based on your findings, you need to prioritize which issues to address immediately vs. later. For example, high-severity problems that blocked task completion should be fixed before moving forward, while minor polish issues can often wait.
Update your Figma prototype based on stakeholder input and prioritized findings, then run another test to validate if your changes improved the experience. This iterative approach ensures you're always making evidence-based design decisions.
The earlier you test, the faster the time-to-right
When you test early, you catch unclear copy, confusing flows, and dead-end paths while they’re nothing more than edits in a Figma file. Leave it too late, and you’ll be investing time, effort, and budget in post-launch reworks.
Maze turns prototype testing into a consistent practice. You connect your Figma prototype, define focused missions, and get task metrics, paths, heatmaps, and clips in one place that your team can act on.
If you want a shorter time-to-right, import your prototypes to Maze and put users at the center of your decision-making process.


Frequently asked questions about testing Figma prototypes
What’s the easiest way to test a Figma prototype?
What’s the easiest way to test a Figma prototype?
The easiest way to test a Figma prototype is by importing your prototype into Maze. Copy your Figma prototype share link, paste it into a prototype testing block inMaze, and the platform handles everything from recruiting participants to generating automated reports. You can launch tests in minutes and collect actionable insights within hours.
What are the benefits of testing Figma prototypes with Maze?
What are the benefits of testing Figma prototypes with Maze?
Maze simplifies the entire testing process from start to finish. You can import Figma prototypes (including AI-generated prototypes) with a single click, run usability tests on high-fidelity designs, and access built-in participant recruitment through Maze panel and Maze Reach.
The platform automatically generates UX reports with usability scores, heatmaps, mission path analysis, and AI-powered thematic analysis as participants complete tests. Maze also supports A/B testing to compare design variations, follow-up questions to understand user reasoning, and real-time collaboration so teams can comment directly on findings.
Does Maze support Figma’s interactive components?
Does Maze support Figma’s interactive components?
Yes, Maze fully supports Figma's interactive components. Participants can interact with functional elements like checkboxes, toggles, and dropdowns in your prototype. If you need these interactions to appear in your path analysis and success metrics, simply enable the interactive components toggle when setting up your test. Maze will then track state changes as part of the expected path and include them when measuring direct versus indirect success.
What type of analytics and usability metrics can I get from Maze tests?
What type of analytics and usability metrics can I get from Maze tests?
Maze generates quantitative and qualitative metrics automatically. You'll get usability scores, task completion rates, time on task, misclick rates, and heatmaps that visualize where users clicked most frequently.
Mission path analysis shows the exact routes participants took through your prototype, while direct versus indirect success metrics distinguish between users who followed your intended path and those who explored alternatives.
For qualitative insights, AI-powered thematic analysis automatically groups open-ended responses by themes and identifies sentiment trends in user feedback.