


Chapter 3
Creating an unmoderated study with Maze building blocks
Unmoderated studies are one of the fastest ways to gather feedback at scale without the overhead of scheduling live sessions. You can launch a study, let participants complete it in their own time, and spot patterns faster.
They are especially useful when you want to validate flows, test prototypes, measure task success, or gather directional feedback at scale. Since participants move through the study on their own, unmoderated research can also reveal where instructions are unclear, where tasks break down, and where users hesitate without a moderator stepping in to guide them.
Maze helps you run these studies in a way that still feels structured and rigorous. With blocks, you can build study flows, combine different question and task types, and create repeatable setups that are easier to launch and refine.
In this chapter, we'll cover:
- When to use unmoderated research and the questions it's best suited to answer
- How to build and launch an unmoderated study in Maze
- Overview of block types and when to use them
- How to analyze and share unmoderated study results
By the end of this chapter, you’ll be able to design a clear, structured unmoderated study that collects high-quality feedback and delivers insights your team can act on without needing a live researcher present.
When to choose an unmoderated study
Unmoderated studies are ideal when you want to collect feedback quickly, consistently, and at scale, without needing a live researcher on hand to help. Participants complete the study on their own time following a structured flow you design in advance. This makes unmoderated research especially effective for repeatable tasks, clear questions, and situations where speed and reach matter.
Choose an unmoderated study when you need to:
- Test with many participants to identify patterns, trends, or usability issues
- Gather quantitative feedback asynchronously across time zones or large audiences
- Validate designs, content, or flows with minimal facilitation
- Run lightweight or repeatable research as part of an ongoing product or design workflow
Because the experience is standardized, every participant sees the same prompts and tasks, making it easier to compare responses and scale learning.
💡 Wondering how many participants you need? For unmoderated studies, aim for at least 20 participants. Research shows groups of 20 consistently uncover 95% of usability issues. If you're running quantitative research, NNGroup recommends going up to 40.
What research questions are unmoderated studies best suited for?
Unmoderated studies work best when the task and questions are well-defined and don’t require real-time follow-up. They’re especially effective for:
- Usability and task validation: Can users complete a task? Where do they get stuck? How intuitive is the flow?
- Design and concept testing: Do users understand this screen or message? Which version performs better? What stands out at first glance?
- Information architecture research: Can people find what they’re looking for? Does the structure match expectations?
- Measuring perception and comprehension: What do users think a product or concept is about? What do they remember after interacting with it?
- Capturing behavioral signals at scale: How do people naturally interact with a prototype, website, or app? What patterns emerge across many participants?
When to consider a different study type
Unmoderated studies can't adapt in real time. If a participant misreads a task, takes an unexpected path through your prototype, or abandons a flow without explanation, there's no moderator present to pause, clarify, or ask what happened. You get the behavior, but not always the reason behind it.
Here are a few common situations where a different study, like a moderated or AI-moderated study, will serve you better:
- You're in early-stage discovery: Exploring a problem space, uncovering unmet needs, or confirming you're solving the right problem in the first place
- You need to ask follow-up questions: A participant clicks somewhere unexpected or skips a step, and you need to understand why
- Your prototype isn't fully built: Participants may need hand-holding to navigate an early-stage or complex flow without getting lost
- Your audience is less tech-savvy: Not everyone is comfortable completing a self-guided test, and a moderator can help them stay on track
- Your study is long or complex: The longer the session, the faster attention fades; a moderator keeps participants focused and engaged
Unmoderated studies are a powerful way to build continuous feedback into your product and design process, turning everyday questions into fast, reliable insights.
Building an unmoderated study in Maze
Once you've defined your research objectives, building an unmoderated study in Maze is easy. Here's how to go from a blank canvas to a study that's ready to share.
Step 1: Create your study and start building
When you create a new study, Maze drops you straight into the Build view. This is where you create and organize the participant experience, including the screens, tasks, and questions people move through during the study.
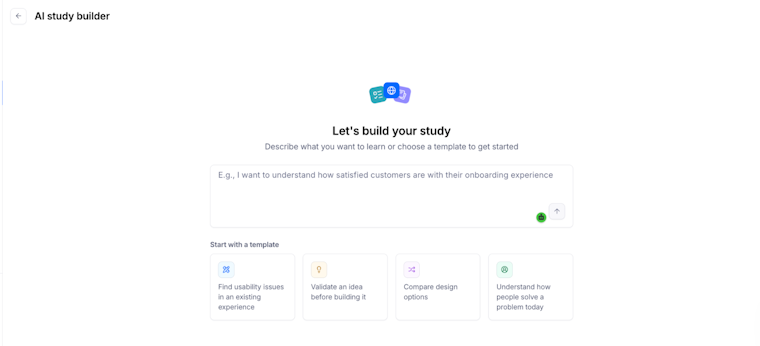
If you want a head start instead of building from a blank canvas, you can use AI study builder. Describe what you want to learn, and Maze will propose a complete unmoderated study structure—choosing block types, drafting unbiased questions, and suggesting a logical flow you can then review and refine in the builder.

Every study starts with a default welcome screen, which is the first thing participants see when they open your study. Use it to set context, explain what you're testing, and tell participants why their input matters. A clear Welcome screen reduces drop-off before the study even starts.

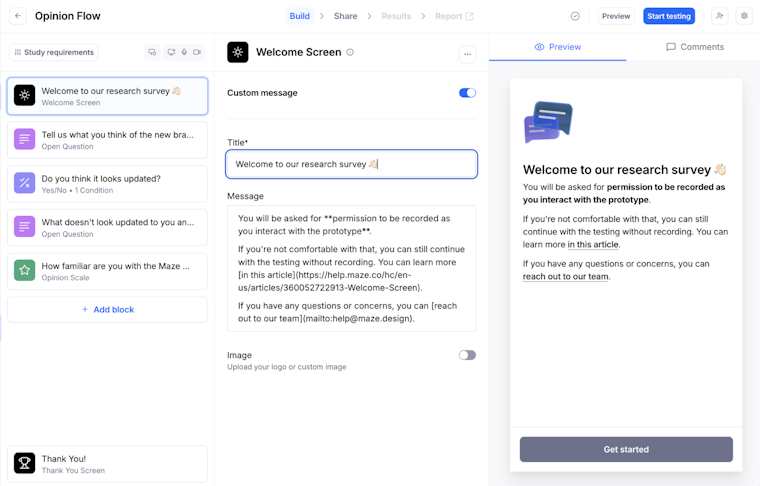
Step 2: Add blocks
Blocks are what your study is made of—each one represents a task, question, or screen participants will interact with. You add them from the left-side panel and arrange them in any order by dragging and dropping as needed.
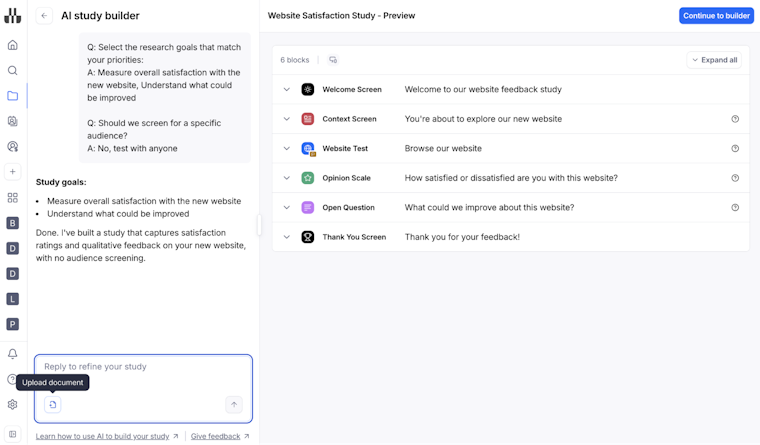
If you used AI study builder, the AI will first show you a draft study outline in the chat experience. You’ll see recommended block types, a proposed flow, and suggested low‑bias question copy based on your prompt.
Take a moment to refine this draft by asking the AI to add or remove blocks, rewrite questions, or adjust the flow. When you’re happy, click ‘Continue to builder' and Maze will apply the updated structure so you can finish configuring each block.

A few things to keep in mind as you build:
- Start with a Screener block if you only want responses from specific types of participants. It filters people out before they get into the main study, saving you from cleaning results later.
- Use Context screens between tasks to give participants clear instructions before a new section begins.
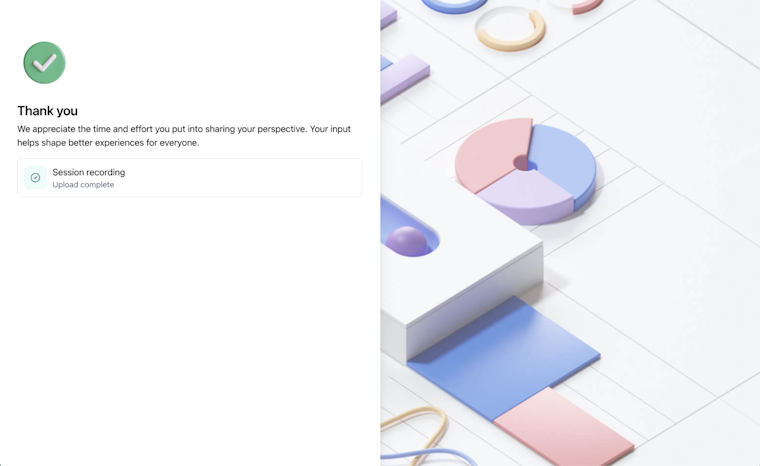
- End with a Thank you screen. It closes the experience cleanly and leaves participants with a good impression.

Here’s a full list of the block types you can add in Maze:
Step 3: Configure study requirements
Once your blocks are in place, head to Study requirements in the left sidebar. This is where you set the conditions for participation and choose what data Maze should collect alongside study responses.
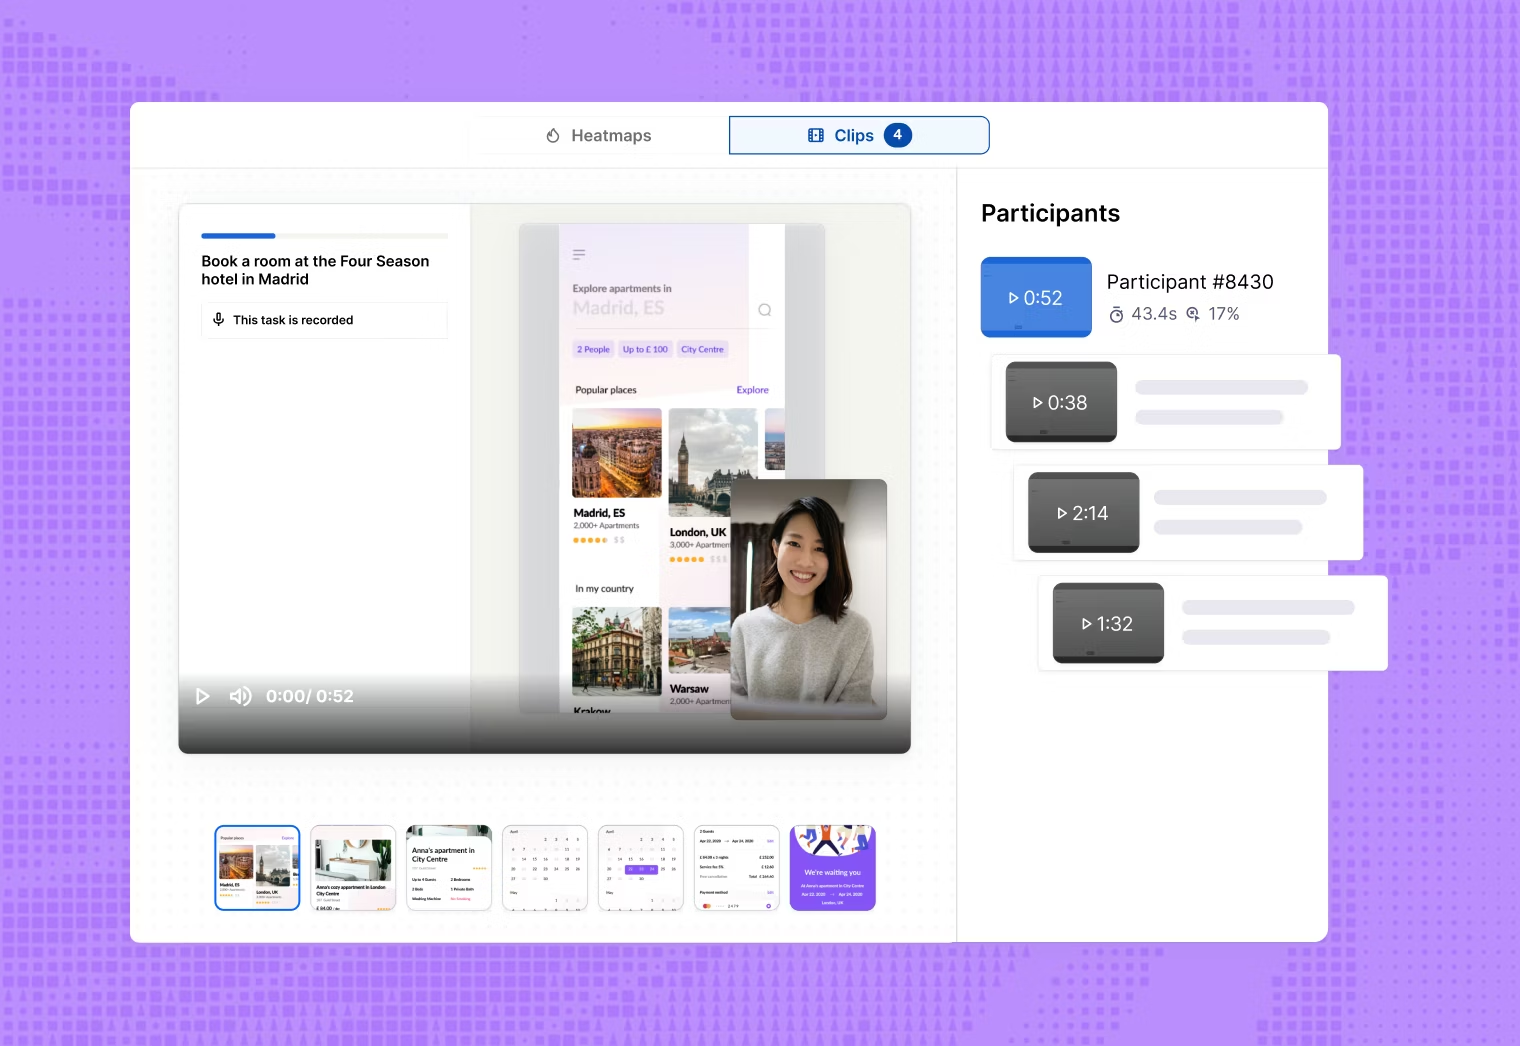
You can enable Clips, Maze's screen recording feature, to capture:
- Camera recordings to see facial expressions and reactions
- Screen recordings of how participants navigate your prototype or website
- Microphone recordings to hear participants think out loud as they complete tasks
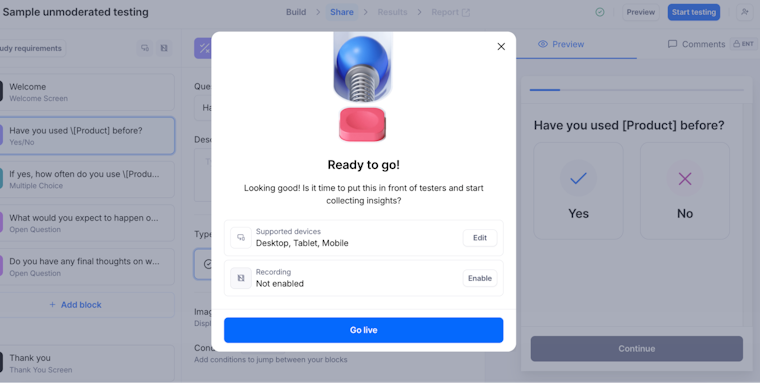
You can also set device requirements here. Specify whether participants should complete the study on a desktop, tablet, or mobile. This is especially important for prototype or website tests, where the experience differs significantly across devices.

💡 To capture mobile recordings, use the Live Mobile Test block together with the Maze Participate app (available on Google Play and App Store). If participants complete an unmoderated study in their mobile browser without Live Mobile Testing, Maze will still collect their answers and clicks, but it will not record their screen.
Step 4: Adjust settings
In Settings, you manage how the Maze is shared and governed. This includes moving the Maze between projects, protecting access with a password, and deleting it if needed.
You can also connect integrations like Slack (we covered how to set this up in Chapter 2), so results are delivered to your team in real time.
Step 5: Preview and launch
Before sharing your study with anyone, always preview it as a participant first. Walk through every block, complete every task, and read every question as if you're seeing it for the first time. This is your last chance to catch broken flows, unclear instructions, or missing context screens.
When you're happy with the experience, click Share to distribute it using your preferred recruitment method—whether that's Maze panel or your own participant list.
From the moment the first participant completes the study, responses are captured and organized automatically in your results dashboard, ready for analysis.

Up next: Setting up a prototype test
In the next chapter, we go deeper into prototype testing and show you how to spot where users get stuck during a task. From there, you’ll learn how to identify friction points, interpret task results with more context, and understand where a flow is helping users move forward or slowing them down. The goal is to turn participant behavior into design decisions backed by clearer evidence.