


Chapter 4
Running prototype testing with Maze blocks
Prototype testing is a user testing method that enables UX designers and product teams to validate designs early, catch usability issues before the development process, and make confident data-driven design decisions using real user feedback.
In a prototype test, you define clear tasks for participants and then review task metrics like completion rate, abandonment, misclicks, and the paths they take between screens.
In this chapter, we'll cover:
- What prototype testing is and when to use it across the UX design process
- Goal-based and free-explore tasks, and when to choose each
- Writing effective tasks and descriptions for participants
- Building a prototype test in Maze
- Comparing design variants with the Variant Comparison block
- Previewing and launching your study
By the end of this chapter, you'll be able to confidently create prototype tests in Maze that capture real user behavior and generate actionable design insights.
What is prototype testing in Maze?
Prototype testing in Maze allows you to observe how participants move through an interactive design in order to understand what works, what doesn’t, and what needs to change.
Prototype testing works across all types of prototypes and fidelity levels. Low-fidelity prototypes like wireframes and mockups are great for early directional feedback, while high-fidelity prototypes and interactive prototypes are better suited for validating functionality and user experience closer to launch.
Depending on your testing goals, you might test:
- A full end-to-end user flow
- A specific screen or interaction
- A single critical flow, like checkout or onboarding
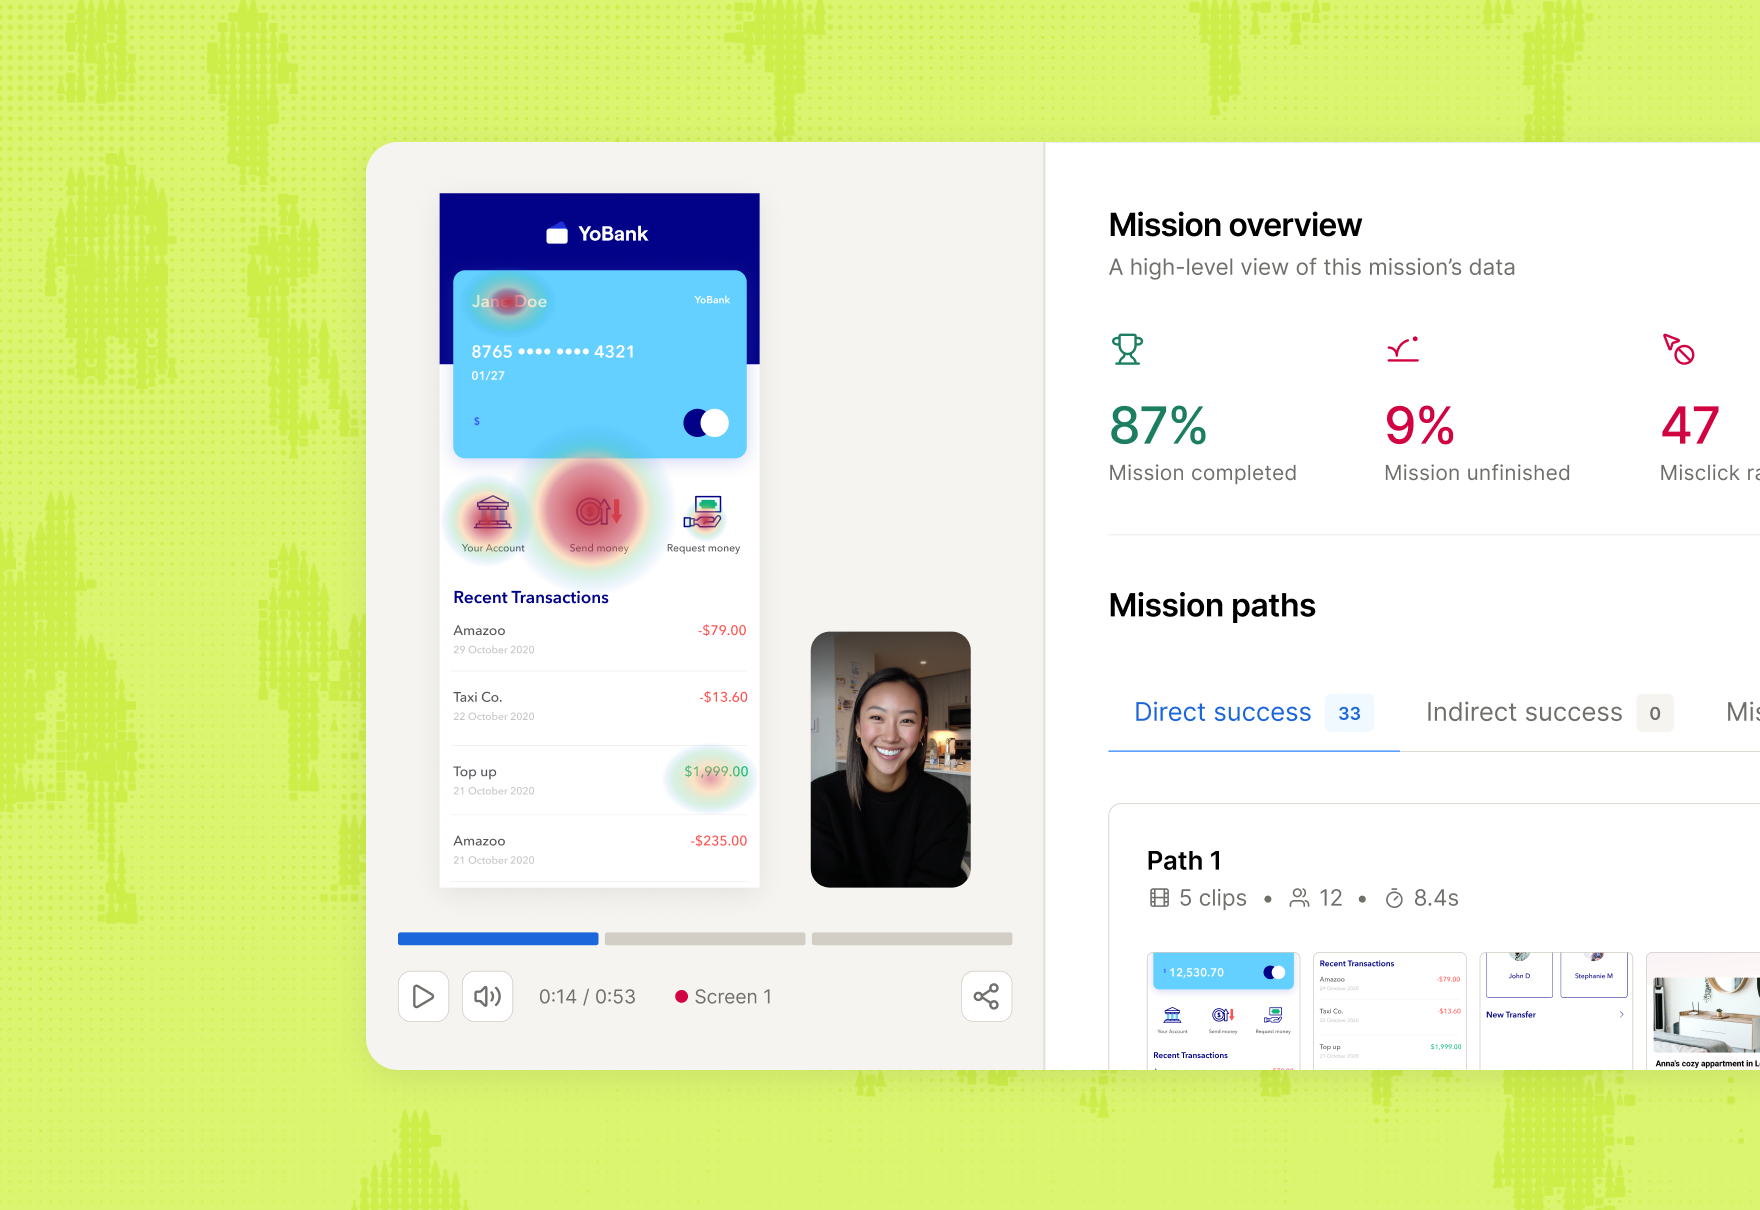
Prototype testing enables you to collect important usability metrics and data. As participants click or tap through your prototype, Maze records:
- Time on task: How long it takes participants to complete a task, which can help you spot tasks that feel confusing, slow, or overly complex
- Task success and failure: Whether participants complete the task as expected or run into problems that stop them from finishing
- User flow with paths taken and detours: The route participants follow through the prototype, including where they stay on the expected path and where they branch off or get sidetracked
- Misclicks and hesitation: Moments where participants click the wrong area, pause, or appear unsure about what to do next
- Qualitative user feedback through follow-up questions: Qualitative feedback that adds context to participant behavior and helps explain why they acted the way they did

💡 Test early and test often. Run at least one usability test before handoff to development, and continue testing as designs evolve to catch issues before they ship.
The way you shape that experience and what Maze measures depends on how you set up your prototype tasks. These are the actions participants try to complete inside your prototype, and they're where you define what success looks like.
Let's look at how they work.
What are task types in Maze?
When you set up a prototype test in Maze, each task can be either goal-based or free explore. The task type controls how success is defined and which metrics you see in your results.
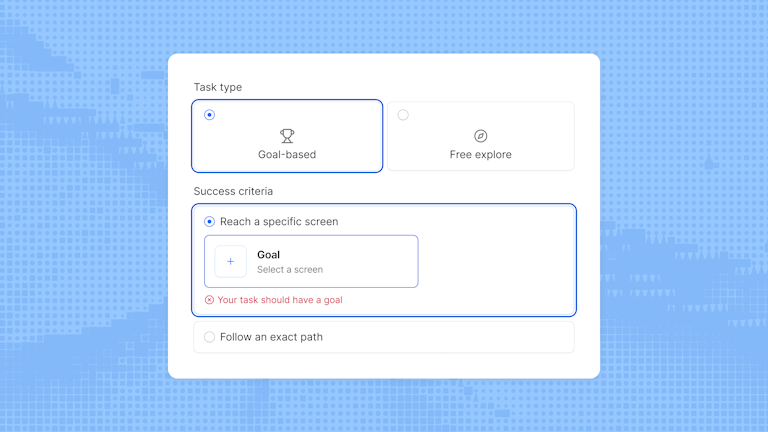
Goal-based tasks
Use a goal-based task when you want Maze to measure whether participants complete a task successfully. This gives you more structured performance data, including metrics like success rate, time on task, paths taken, and misclicks. Goal-based tasks can also support usability metrics such as the usability score.
Within a goal-based task, you can define success in one of two ways:
- Reach a specific screen: The task is marked as success as soon as a participant lands on the screen you've defined as the goal, regardless of how they got there
- Follow an exact path: A direct success is recorded only when participants follow the exact path you've mapped. Participants who reach the end screen in a different way are still counted as an indirect success
You can also toggle on Enable interactive components to allow participants to interact with any interactive components built into your Figma prototype, like dropdowns, hover states, or overlays.
Free explore tasks
Use free explore when you want participants to move through the prototype without a predefined success path. This is useful for concept testing, early-stage designs, and more complex prototypes where a fixed path would be too restrictive or too time-consuming to define.
Because there is no set goal screen, participants end the task themselves by clicking End task when they feel they are done. Results focus more on qualitative and behavioral insight, such as common paths, click data, heatmaps, and Clips recordings.
💡 Not sure which task type use? If your prototype is early-stage or complex to navigate, Free explore removes the pressure of a defined goal and often surfaces richer, more unexpected behavioral data.

Best practices for creating clear tasks and descriptions
When creating tasks and descriptions, aim to simulate real-world behavior without guiding users toward the ‘correct’ answer.
1. Use the task to define the action
The task field sets the goal—what you want participants to do. Your target audience should be able to read it and know immediately what they're trying to accomplish. Save the details for the description.
✅ "Book a flight to Rome."
❌ "Click on flights, select Rome, choose your dates, and proceed to checkout."
Good action verbs to lean on: complete, find, create, go to, add, book, subscribe, and filter.
2. Use the task description to add context
Use the description to set the scene in one or two short sentences (around 20–40 words). Focus on the situation, not step‑by‑step UI instructions, so participants clearly understand the goal before they start.
✅ “You’re planning a weekend trip to Rome next month. Book a return flight that works for you.”
❌ “On the Flights page, select Rome as the destination, pick your dates, then click ‘Search’ and ‘Continue’.”
3. Avoid leading language
Don't tell participants where to click or what to look for. Approximate real-life conditions as closely as possible. In a live product, there are no instructions.
✅ "Create a profile and save your information."
❌ "Click the 'Create Profile' button, fill in your details, upload a picture, and click 'Save'."
4. Match the task type to your goal
Choosing the right task type makes sure you get metrics that answer your research questions. For example, use goal-based tasks when you have a clear end state to measure. And use free explore tasks when you want to see how people naturally move through an area without a fixed success screen.
✅ Goal-based: “Complete checkout for any item in your cart.”
❌ Goal-based: “Explore the new homepage and click around wherever you like.”
✅ Free explore: “Spend a few minutes exploring the new homepage and navigation.”
❌ Free explore: “Find and purchase the annual Pro plan using the shortest possible path.”
5. Combine tasks with questions
Combining tasks with questions helps you understand what participants did and why they behaved that way. Tasks capture behavior while questions capture expectations, confidence, and reasoning.
After a task, you can add follow-up questions to learn:
- Why participants struggled or succeeded
- How confident they felt completing the task
- What they expected to happen at key moments
✅ “On a scale from 1–5, how confident did you feel completing this task?”
✅ “What, if anything, felt confusing or unexpected while you were completing this task?”
❌ “Why didn’t you follow the correct path?”
6. Keep the number of tasks manageable
Keeping your study short and focused leads to better data and fewer dropouts. Instead of counting tasks, think about total time. A well-scoped unmoderated study should take participants no longer than 10–15 minutes to complete. If yours is running longer, it's a sign to trim tasks or split into separate studies.
✅ “Three to five focused tasks that fit in a 10–15 minute session.”
❌ “Ten detailed tasks that take 30 minutes or more to complete.”
Now that you know how to write tasks and descriptions well, it's time to bring everything together.
The next sections walk you through building a prototype test in Maze from scratch, from importing your prototype and configuring your tasks, to setting descriptions and comparing design variants.
Creating a new Maze for prototype testing
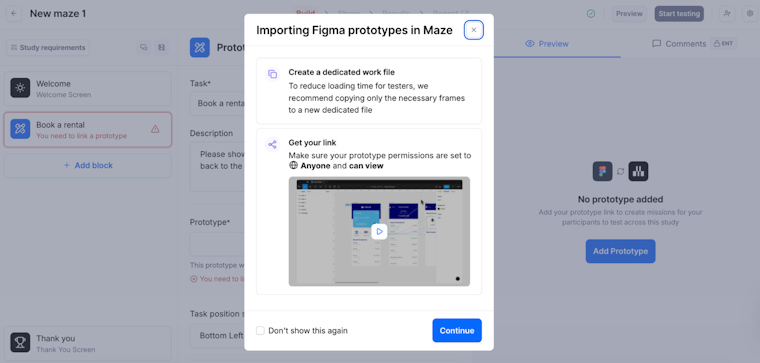
Every prototype test in Maze starts by importing a prototype, which participants will interact with while completing tasks. Maze supports Figma prototypes, including those created with AI-prototyping tools like Figma Make, Bolt, and Loveable. Once the prototype is imported, you can define tests that guide participants through specific tasks.
💡 Before you start: Make sure your Figma file permissions are set to ‘Anyone can view’. The import will fail without this, and changing permissions after import will prevent participants from opening the study.
Follow these steps:
- From your Home screen or within a Project, click New Study
- Configure your Maze and add a Prototype Test block
- If it's your first import, select Figma as your default prototyping tool
- Define your Task and Description
- Select + Add prototype and paste in your prototype link. You'll be asked to log in to your Figma account and allow access if you haven't already
- Click Import
Your prototype will load directly into the builder, where you can begin creating missions and defining expected paths.

💡 Each maze can contain one prototype, but a Project can include multiple mazes, allowing you to test different designs or variations side by side.
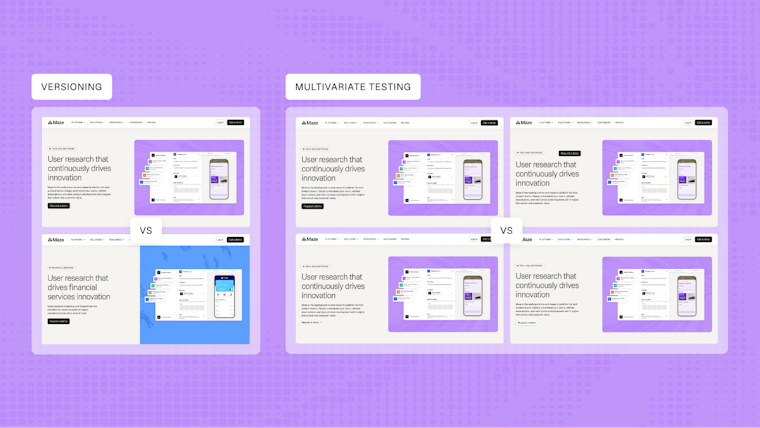
Comparing design variants in Maze
Maze's Variant Comparison block lets you test multiple design variations within a single study and compare results side by side. This is a research-based testing method, different from A/B testing in a live product.
Here, you're recruiting participants specifically to evaluate your designs, rather than splitting live traffic. It's especially useful when evaluating new features, information architecture decisions, or competing design directions before committing to one.
You can add up to five variants per block, and each variant can contain any block type, including prototype tests, opinion scales, and open questions.

💡 One prototype per maze: All variants must use screens from the same Figma file. You can't import separate files for each variant—instead, design your different flows within one file and change the start screen for each variant.
Follow these steps:
- Add a Variant Comparison block
- Name each variant to make results easier to read (e.g., "Nav A" and "Nav B"); these names are only visible to you, not participants
- Add up to five variants, depending on the number of prototypes you wish to compare
- Choose your distribution method:
a. Exclusive: Participants are randomly assigned to one variant only
b. Alternating: Participants see all variants in a randomized order - Add blocks to your first variant; for prototype tests, follow the import steps in the previous section
- Use the Duplicate button to copy your first variant's setup across the others, then adjust the start screen for each flow
Variant Comparison will automatically provide you with side-by-side comparisons from your prototype tests so that you can easily see which prototype performed better based on the metrics available.
Preview and launch your prototype test
While building your Maze, it remains in draft mode. Use Preview to experience the test as a participant. It's your last chance to catch broken flows, awkward task wording, or a missing context screen.
When you're happy with the experience, set the Maze live, share it with participants, and start collecting insights.
Up next: Recruiting and managing test participants
Now that you know how to set up and run prototype tests in Maze, the next step is finding the right participants to join your studies. Your results are only as good as the people you recruit—if they don’t match your real audience, you can end up optimizing for the wrong problems or missing important issues altogether.
In the next chapter, we’ll look at how to define your target audience, and recruit and manage participants in Maze so your studies reflect the people you’re actually designing for.